
【效果】(這裡下載的軟體收費的試用有水印) 【推薦】這裡推薦一個圖標網http://iconfont.cn/。以上圖標來自此圖標網 【項目結構】 【步驟】 ①創建佈局文件,寫底部導航欄 ②定義Fragment 【提示】可以通過下圖方式創建 對於生成的Fragment不用作修改,對應的佈局中設置一個背 ...
【效果】(這裡下載的軟體收費的試用有水印)

【推薦】這裡推薦一個圖標網http://iconfont.cn/。以上圖標來自此圖標網
【項目結構】

【步驟】
①創建佈局文件,寫底部導航欄
  1 <?xml version="1.0" encoding="utf-8"?>
  2 <LinearLayout xmlns:android="http://schemas.android.com/apk/res/android"
  3     xmlns:app="http://schemas.android.com/apk/res-auto"
  4     xmlns:tools="http://schemas.android.com/tools"
  5     android:layout_width="match_parent"
  6     android:layout_height="match_parent"
  7     tools:context=".MainActivity"
  8     android:orientation="vertical">
  9
 10     <RelativeLayout
 11         android:id="@+id/rl_content"
 12         android:layout_width="match_parent"
 13         android:layout_height="0dp"
 14         android:layout_weight="1">
 15        <!--這裡設置權重weight為1, 下麵不設置權重。-->
 16         <!--意思是,剩餘的位置全都是RelativeLayout的-->
 17     </RelativeLayout>
 18
 19     <TextView
 20         android:layout_width="match_parent"
 21         android:layout_height="1dp"
 22         android:background="#797878"/>
 23     <LinearLayout
 24         android:layout_width="match_parent"
 25         android:layout_height="80dp"
 26         android:orientation="horizontal">
 27         <LinearLayout
 28             android:id="@+id/item1"
 29             android:layout_width="0dp"
 30             android:layout_weight="1"
 31             android:layout_height="match_parent"
 32             android:orientation="vertical">
 33             <ImageView
 34                 android:id="@+id/item1_iv"
 35                 android:layout_width="match_parent"
 36                 android:layout_height="0dp"
 37                 android:layout_weight="3"
 38                 android:layout_margin="3dp"
 39                 android:scaleType="fitCenter"
 40                 android:src="@drawable/wxb"
 41                 android:padding="1dp"/>
 42             <TextView
 43                 android:id="@+id/item1_tv"
 44                 android:text="女王"
 45                 android:textSize="16sp"
 46                 android:layout_width="match_parent"
 47                 android:layout_height="0dp"
 48                 android:layout_weight="1"
 49                 android:gravity="center"/>
 50         </LinearLayout>
 51         <LinearLayout
 52             android:id="@+id/item2"
 53             android:layout_width="0dp"
 54             android:layout_weight="1"
 55             android:layout_height="match_parent"
 56             android:orientation="vertical">
 57             <ImageView
 58                 android:id="@+id/item2_iv"
 59                 android:layout_width="match_parent"
 60                 android:layout_height="0dp"
 61                 android:layout_weight="3"
 62                 android:layout_margin="3dp"
 63                 android:scaleType="fitCenter"
 64                 android:src="@drawable/meizhuang"
 65                 android:padding="4dp"/>
 66             <TextView
 67                 android:id="@+id/item2_tv"
 68                 android:text="美妝"
 69                 android:textSize="16sp"
 70                 android:layout_width="match_parent"
 71                 android:layout_height="0dp"
 72                 android:layout_weight="1"
 73                 android:gravity="center"/>
 74         </LinearLayout>
 75         <LinearLayout
 76             android:id="@+id/item3"
 77             android:layout_width="0dp"
 78             android:layout_weight="1"
 79             android:layout_height="match_parent"
 80             android:orientation="vertical">
 81             <ImageView
 82                 android:id="@+id/item3_iv"
 83                 android:layout_width="match_parent"
 84                 android:layout_height="0dp"
 85                 android:layout_weight="3"
 86                 android:layout_margin="3dp"
 87                 android:scaleType="fitCenter"
 88                 android:src="@drawable/fuzhuang"
 89                 android:padding="5dp"/>
 90             <TextView
 91                 android:id="@+id/item3_tv"
 92                 android:text="衣帽"
 93                 android:textSize="16sp"
 94                 android:layout_width="match_parent"
 95                 android:layout_height="0dp"
 96                 android:layout_weight="1"
 97                 android:gravity="center" />
 98         </LinearLayout>
 99         <LinearLayout
100             android:id="@+id/item4"
101             android:layout_width="0dp"
102             android:layout_weight="1"
103             android:layout_height="match_parent"
104             android:orientation="vertical">
105             <ImageView
106                 android:id="@+id/item4_iv"
107                 android:layout_width="match_parent"
108                 android:layout_height="0dp"
109                 android:layout_weight="3"
110                 android:layout_margin="3dp"
111                 android:scaleType="fitCenter"
112                 android:src="@drawable/xiebaopeishi"
113                 android:padding="3dp"/>
114             <TextView
115                 android:id="@+id/item4_tv"
116                 android:text="鞋包"
117                 android:textSize="16sp"
118                 android:layout_width="match_parent"
119                 android:layout_height="0dp"
120                 android:layout_weight="1"
121                 android:gravity="center" />
122         </LinearLayout>
123     </LinearLayout>
124 </LinearLayout>
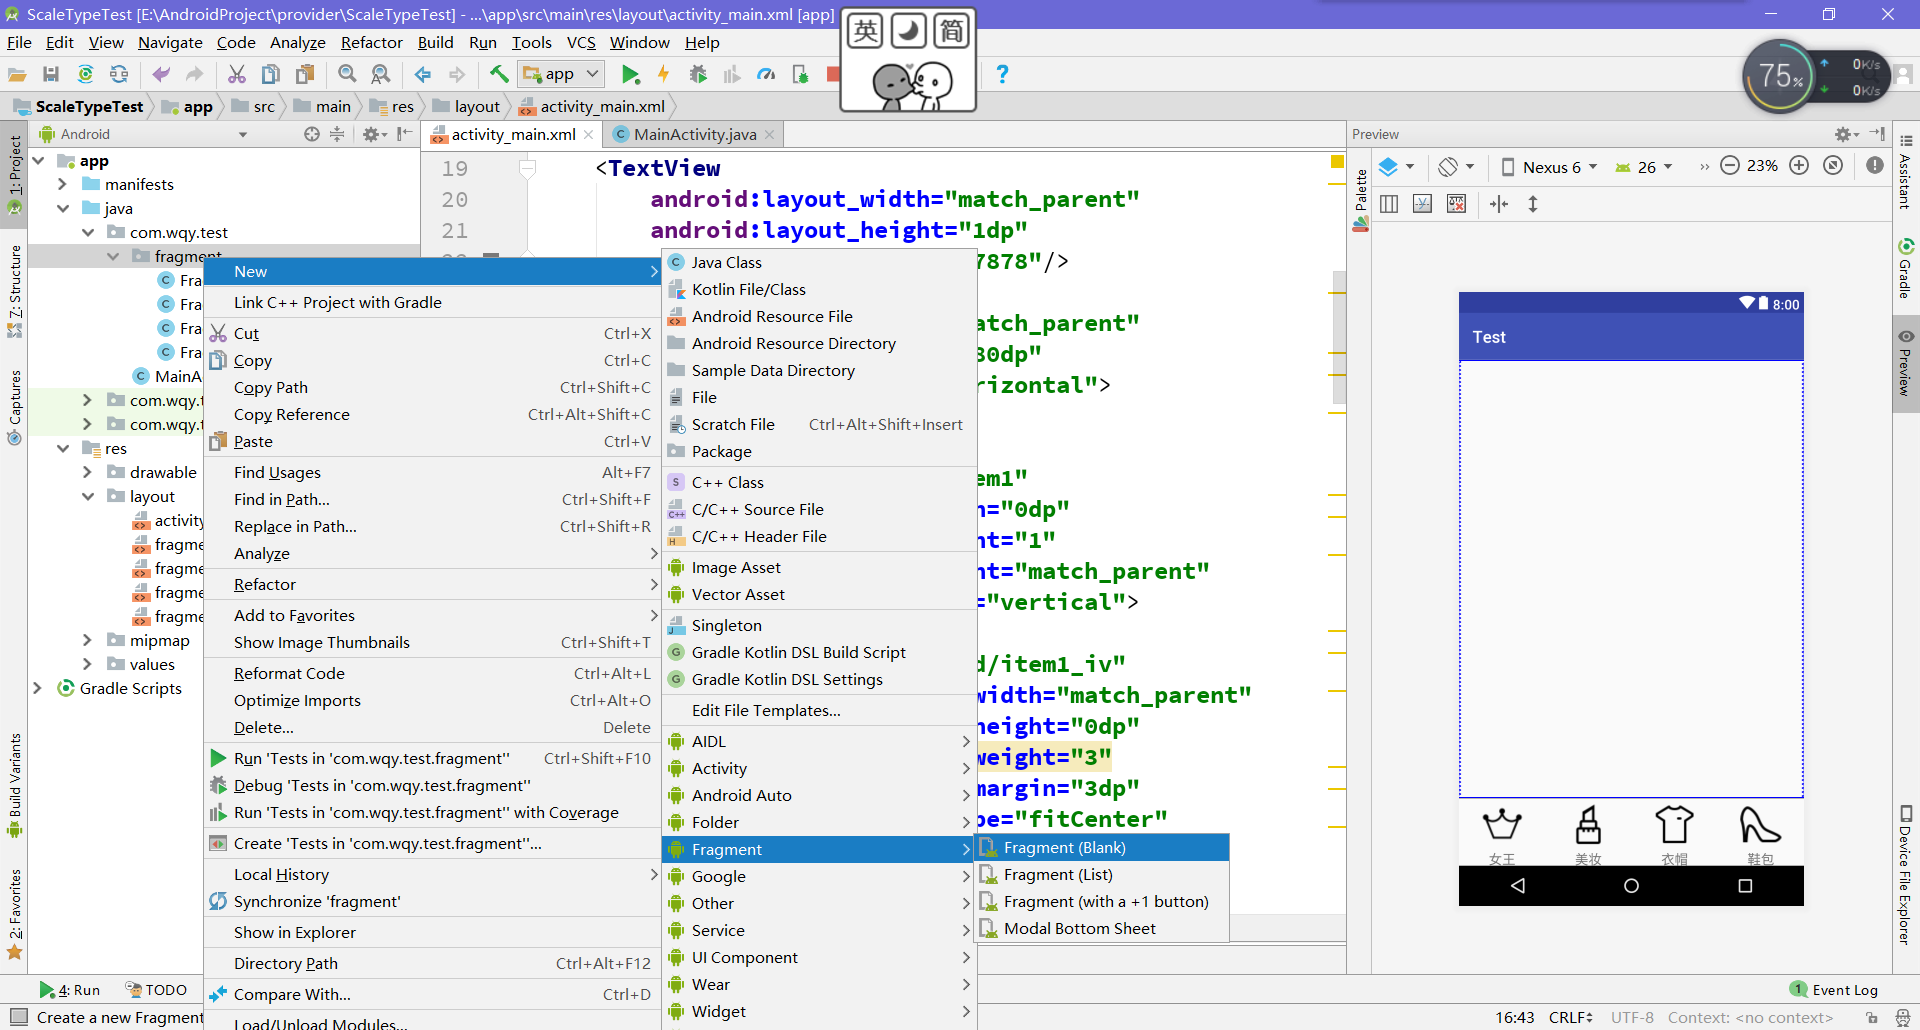
②定義Fragment
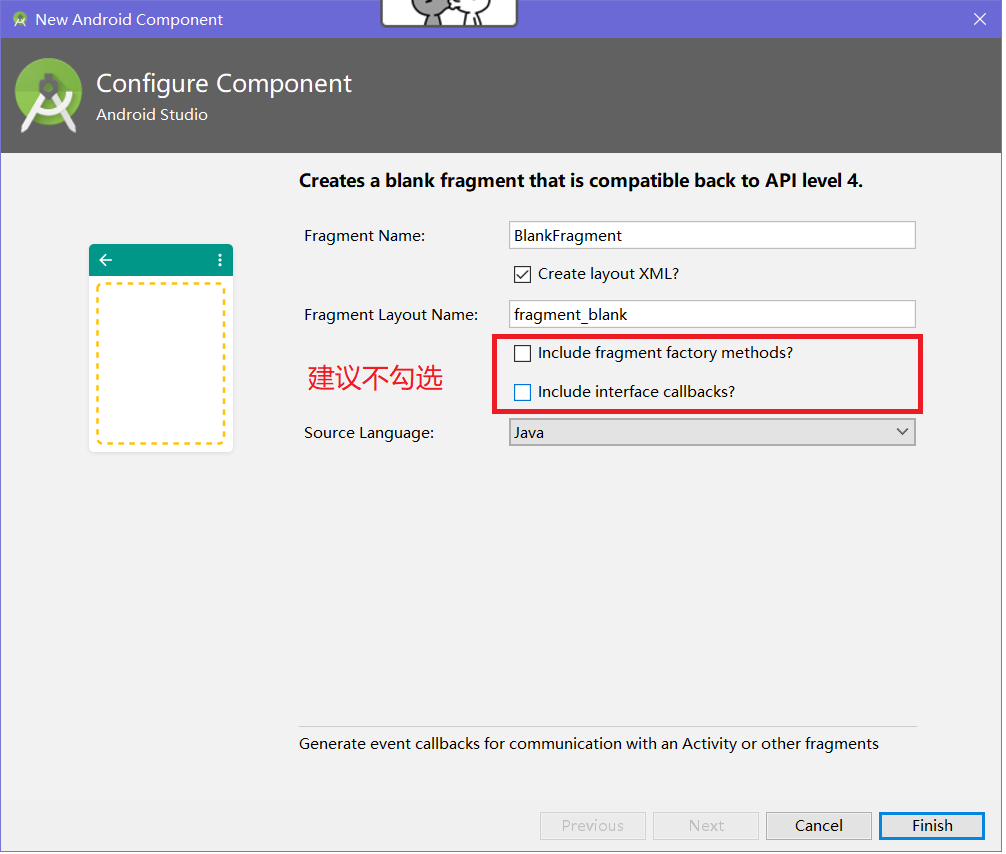
【提示】可以通過下圖方式創建
 1 public class FragmentA extends Fragment {
 2
 3     public FragmentA() {
 4         // Required empty public constructor
 5     }
 6
 7     @Override
 8     public View onCreateView(LayoutInflater inflater, ViewGroup container,
 9                              Bundle savedInstanceState) {
10         // Inflate the layout for this fragment
11         return inflater.inflate(R.layout.fragment_a, container, false);
12     }
13 }
對於生成的Fragment不用作修改,對應的佈局中設置一個背景顏色便於觀察。
③MainActivity代碼的編寫
 1 public class MainActivity extends AppCompatActivity implements View.OnClickListener{
 2
 3     private FragmentManager fragmentManager;
 4     private RelativeLayout rl_content;
 5     private ImageView item1_iv,item2_iv,item3_iv,item4_iv;
 6     private TextView item1_tv,item2_tv,item3_tv,item4_tv;
 7     private LinearLayout item1,item2,item3,item4;
 8     private ImageView[] ivs;
 9     private TextView[] tvs;
10
11     @Override
12     protected void onCreate(Bundle savedInstanceState) {
13         super.onCreate(savedInstanceState);
14         setContentView(R.layout.activity_main);
15
16         initView();
17
18         fragmentManager = getSupportFragmentManager();
19
20         initListener();
21     }
22
23     private void initListener() {
24         item1.setOnClickListener(this);
25         item2.setOnClickListener(this);
26         item3.setOnClickListener(this);
27         item4.setOnClickListener(this);
28     }
29
30     private void initView() {
31         rl_content = (RelativeLayout) findViewById(R.id.rl_content);
32         item1_iv = (ImageView) findViewById(R.id.item1_iv);
33         item1_tv = (TextView) findViewById(R.id.item1_tv);
34         item1 = (LinearLayout) findViewById(R.id.item1);
35         item2_iv = (ImageView) findViewById(R.id.item2_iv);
36         item2_tv = (TextView) findViewById(R.id.item2_tv);
37         item2 = (LinearLayout) findViewById(R.id.item2);
38         item3_iv = (ImageView) findViewById(R.id.item3_iv);
39         item3_tv = (TextView) findViewById(R.id.item3_tv);
40         item3 = (LinearLayout) findViewById(R.id.item3);
41         item4_iv = (ImageView) findViewById(R.id.item4_iv);
42         item4_tv = (TextView) findViewById(R.id.item4_tv);
43         item4 = (LinearLayout) findViewById(R.id.item4);
44         ivs = new ImageView[]{item1_iv,item2_iv,item3_iv,item4_iv};
45         tvs = new TextView[]{item1_tv,item2_tv,item3_tv,item4_tv};
46     }
47
48     @Override
49     public void onClick(View view) {
50         switch (view.getId()){
51             case R.id.item1: {
52                 FragmentTransaction transaction = fragmentManager.beginTransaction();//創建一個事務
53                 transaction.replace(R.id.rl_content,new FragmentA());
54                 transaction.commit();//事務一定要提交,replace才會有效
55                 setCheck(0);//自定義方法
56                 break;
57             }
58             case R.id.item2: {
59                 FragmentTransaction transaction = fragmentManager.beginTransaction();
60                 transaction.replace(R.id.rl_content,new FragmentB());
61                 transaction.commit();
62                 setCheck(1);
63                 break;
64             }
65             case R.id.item3: {
66                 FragmentTransaction transaction = fragmentManager.beginTransaction();
67                 transaction.replace(R.id.rl_content,new FragmentC());
68                 transaction.commit();
69                 setCheck(2);
70                 break;
71             }
72             case R.id.item4: {
73                 FragmentTransaction transaction = fragmentManager.beginTransaction();
74                 transaction.replace(R.id.rl_content,new FragmentD());
75                 transaction.commit();
76                 setCheck(3);
77                 break;
78             }
79             default:break;
80         }
81     }
82
83     public void setCheck(int itemId){
84         //這個方法設置底部導航欄選中時的效果
85         for (int i = 0; i < 4; i++) {
86             ivs[i].setColorFilter(Color.parseColor("#0f0f0f"));
87             tvs[i].setTextColor(Color.parseColor("#0f0f0f"));
88         }
89         ivs[itemId].setColorFilter(Color.GREEN);
90         tvs[itemId].setTextColor(Color.GREEN);
91     }
92 }
【提示】①這裡的點擊事件是通過Activity實現Onclick介面的方式
②getSupportFragmentManager()是v4包中的,相容效果好,如果用getFragmentManager()可能會崩掉
③FragmentManager只需要獲取一次,但是事務FragmentTransaction要重新開啟。最後事務一定要提交commit。
④方法setCheck是為了設置導航的被選中效果。

