
參考 Fedora Quick Docs Fedora Server Documentation Deploy an ARM64 Fedora VM on your PC: 3 steps Architectures/AArch64/Install with QEMU Virtualization ...
參考
-
Creating a virtual machine using Fedora Server Edition disk image
-
8 Linux virsh subcommands for managing VMs on the command line
作者
概述
最近在我的家裡的T620伺服器上折騰Fedora系統時,發現這個系統有很多優點,其中一個就是debuginfod,當你用gdb調試發行版自帶的可執行程式時,它可以幫你自動下載符號表和源碼包,極其方便,雖然ubuntu22.04也開始提供這個功能,但是嘗試了一下,感覺沒有fedora好用。我從事的是嵌入式開發,目標機都是ARM64架構的,所以也想在ARM64上把這個功能用起來。
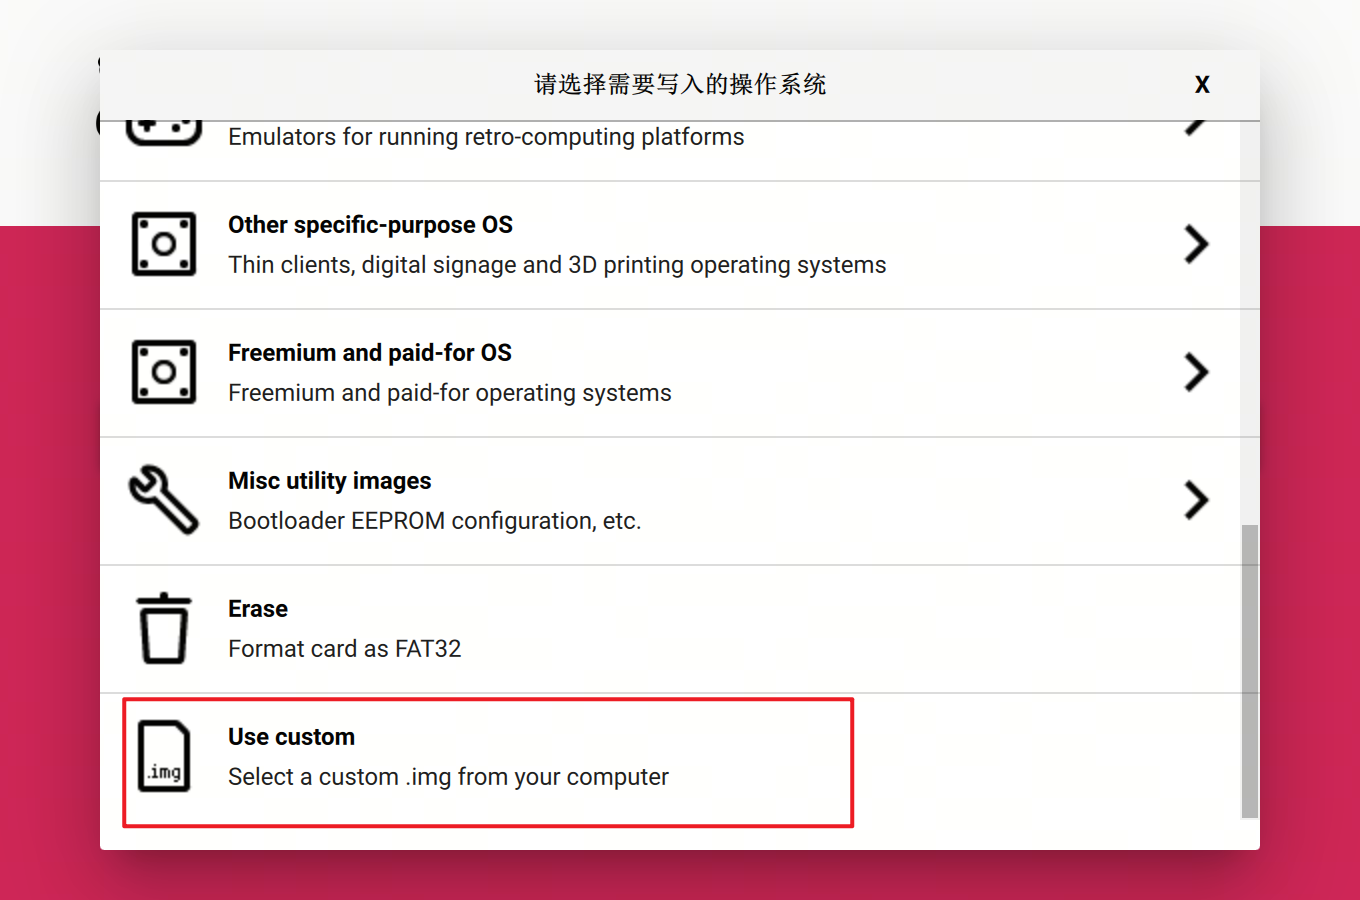
網上看到Fedora支持樹莓派4,然後根據這個文章Fedora on Raspberry Pi操作了一下,確實可以。用樹莓派官方提供的燒錄工具,要寫入的OS選擇Use custom:
寫入的系統也是下麵提到的Fedora-Minimal-39-1.5.aarch64.raw.xz
燒寫完畢,插到樹莓派4B,連上HDMI線和串口,就可以看到啟動界面了,測試發現,串口只能輸出日誌,不能輸入,需要連上一個USB鍵盤到樹莓派4B上來輸入。
帶個樹莓派在身邊也不太方便,能不能用Qemu模擬一個Fedora的運行環境呢?
步驟
安裝虛擬化相關的軟體包
sudo apt install virt-manager
sudo apt install qemu-system-aarch64
啟動服務並且設置為開機啟動
sudo systemctl start libvirtd
sudo systemctl enable libvirtd
下載ARM64版本的fedora39鏡像
下麵是下載鏈接:https://alt.fedoraproject.org/alt/ ,因為後面要在x86上通過qemu模擬,選擇儘可能小的版本,我用的是“Fedora最小安裝”:
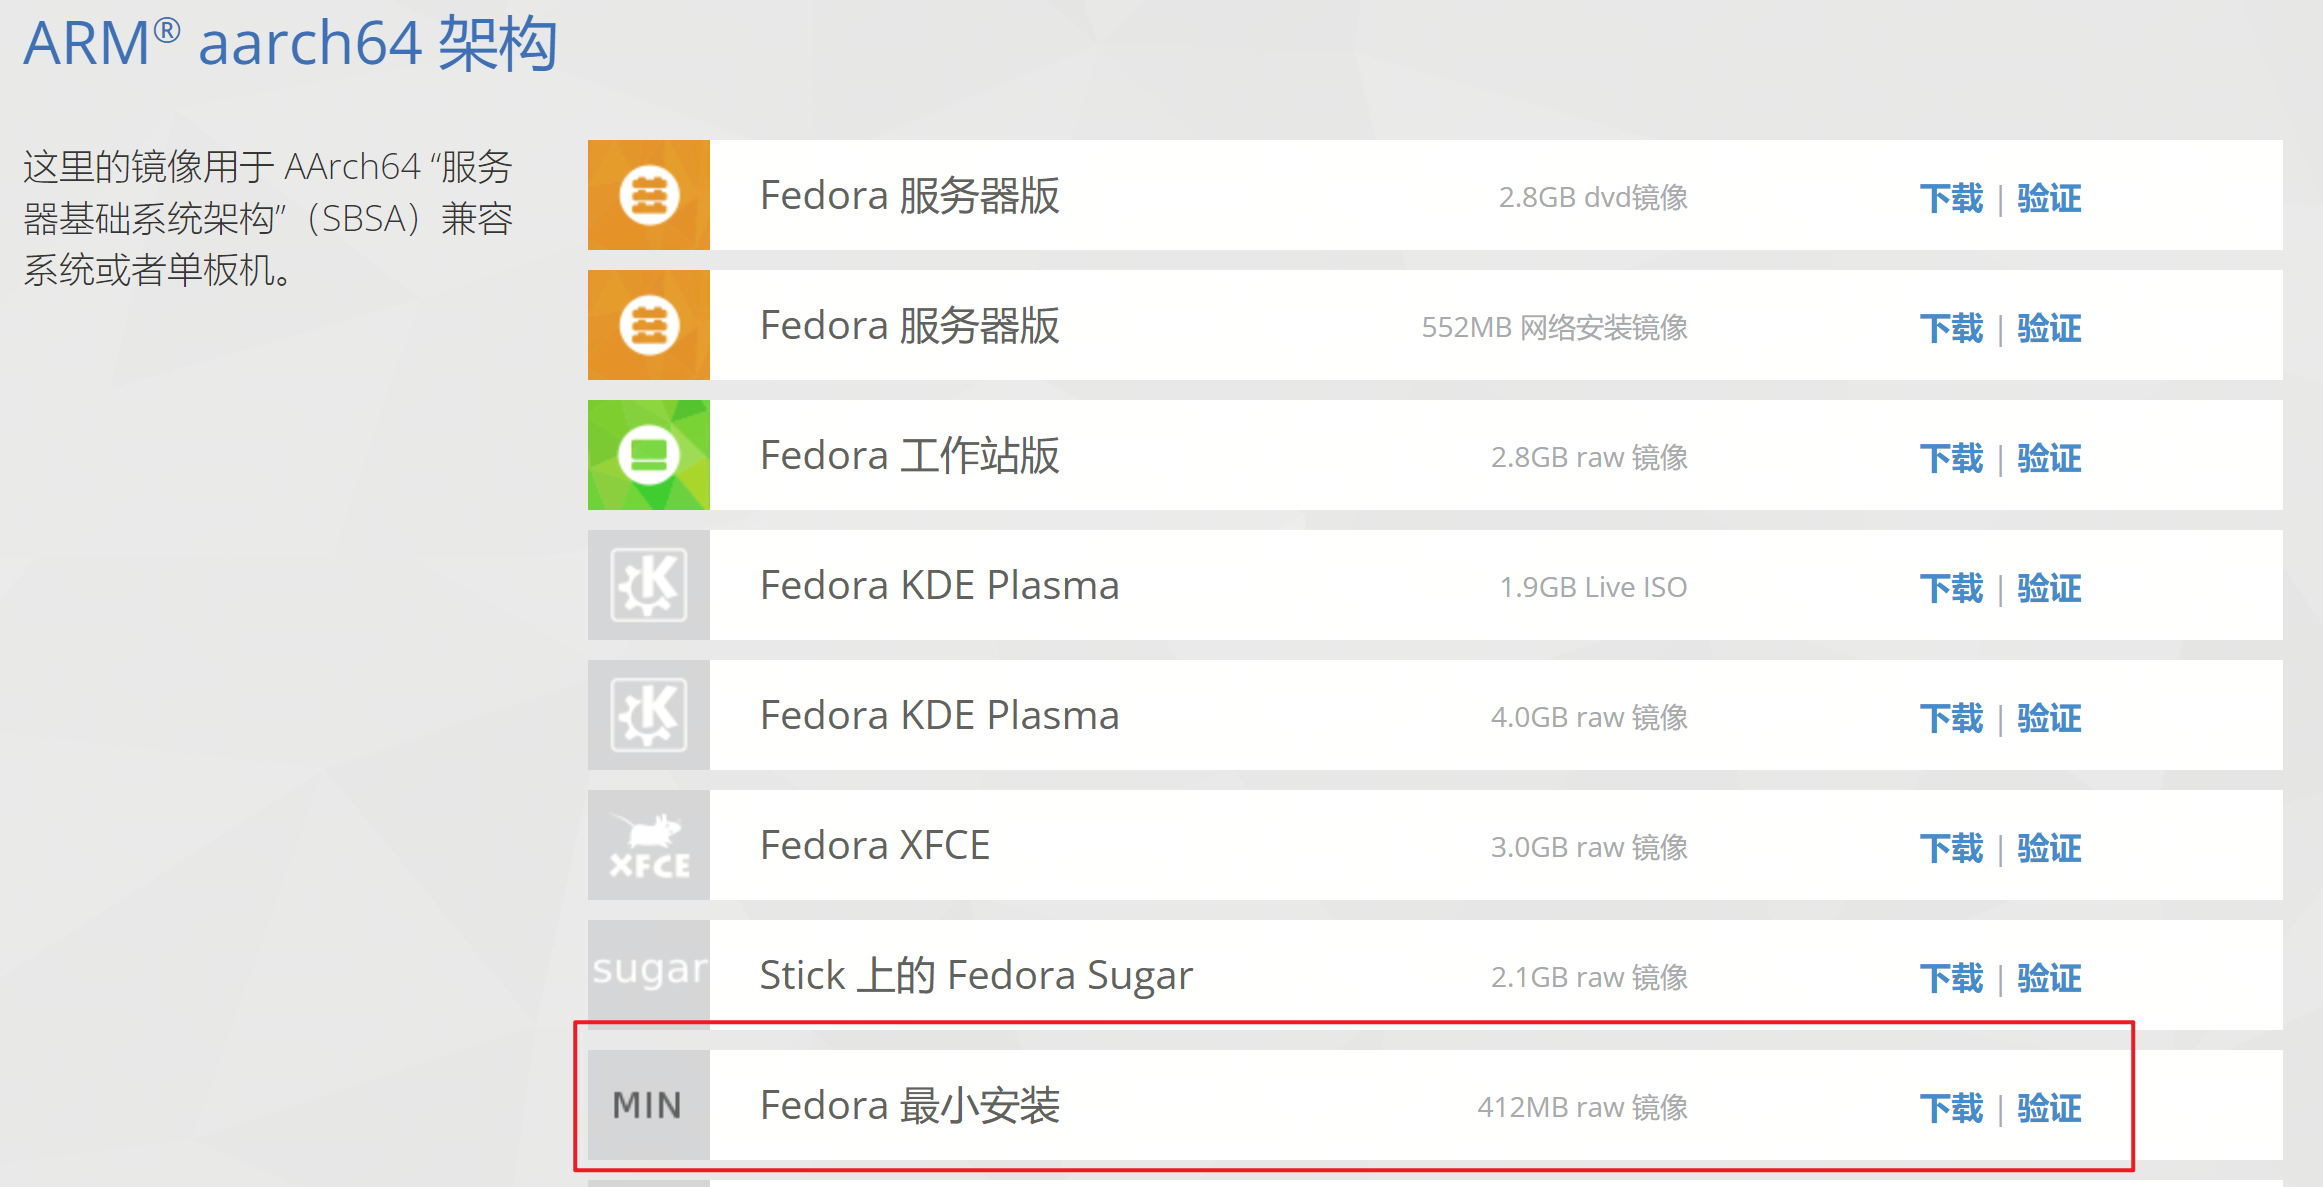
下載得到一個xz壓縮格式的文件:Fedora-Minimal-39-1.5.aarch64.raw.xz
改造虛擬機鏡像
使用7z對這個文件進行解壓縮,得到Fedora-Minimal-39-1.5.aarch64.raw
$ 7z x Fedora-Minimal-39-1.5.aarch64.raw.xz
7-Zip [64] 16.02 : Copyright (c) 1999-2016 Igor Pavlov : 2016-05-21
p7zip Version 16.02 (locale=en_US.UTF-8,Utf16=on,HugeFiles=on,64 bits,12 CPUs Intel(R) Core(TM) i7-8700 CPU @ 3.20GHz (906EA),ASM,AES-NI)

Scanning the drive for archives:
1 file, 798690336 bytes (762 MiB)

Extracting archive: ../Fedora-Minimal-39-1.5.aarch64.raw.xz
--
Path = ../Fedora-Minimal-39-1.5.aarch64.raw.xz
Type = xz
Physical Size = 798690336
Method = LZMA2:23 CRC64
Streams = 1
Blocks = 256

Everything is Ok

Size:       6442450944
Compressed: 798690336
解壓得到的這個文件本身就是一個虛擬機鏡像,可以作為直接作為虛擬機鏡像運行,可以看一下這個虛擬磁碟的信息:
# 找一個空閑的loop設備
$ sudo losetup -f
/dev/loop19

# 綁定
$ sudo losetup /dev/loop19 ./Fedora-Minimal-39-1.5.aarch64.raw

# 用fdisk查看分區信息
$ sudo fdisk /dev/loop19

Welcome to fdisk (util-linux 2.34).
Changes will remain in memory only, until you decide to write them.
Be careful before using the write command.


Command (m for help): p
Disk /dev/loop19: 6 GiB, 6442450944 bytes, 12582912 sectors
Units: sectors of 1 * 512 = 512 bytes
Sector size (logical/physical): 512 bytes / 512 bytes
I/O size (minimum/optimal): 512 bytes / 512 bytes
Disklabel type: dos
Disk identifier: 0xdfc90da8

Device        Boot   Start      End Sectors  Size Id Type
/dev/loop19p1 *       2048  1230847 1228800  600M  6 FAT16
/dev/loop19p2      1230848  3327999 2097152    1G 83 Linux
/dev/loop19p3      3328000 12582911 9254912  4.4G 83 Linux

# 解綁
$ sudo losetup -d /dev/loop19
可以看到,這個磁碟有6GB,太小了,而且是raw格式的,不能打快照,而且太占空間,下麵對這個鏡像進行改造:
- 改造成qcow2格式的
- 將磁碟大小改造為100G
- 創建一個空的qcow2鏡像
$ qemu-img create -f qcow2 fedora39_arm64.qcow2 100G
Formatting 'fedora39_arm64.qcow2', fmt=qcow2 cluster_size=65536 extended_l2=off compression_type=zlib size=107374182400 lazy_refcounts=off refcount_bits=16

$ ls -lh
total 6.1G
-rw-r--r-- 1 pengdl pengdl 194K 3月  27 14:31 fedora39_arm64.qcow2
-rw-rw-r-- 1 pengdl pengdl 6.0G 3月  27 10:52 Fedora-Minimal-39-1.5.aarch64.raw
- 綁定到nbd設備
- 首先需要先載入nbd模塊:
$ sudo modprobe nbd
- 綁定:
sudo qemu-nbd -c /dev/nbd0 ./fedora39_arm64.qcow2
- 拷貝
$ sudo dd if=./Fedora-Minimal-39-1.5.aarch64.raw of=/dev/nbd0
12582912+0 records in
12582912+0 records out
6442450944 bytes (6.4 GB, 6.0 GiB) copied, 175.658 s, 36.7 MB/s
拷貝完畢,執行一下sync,確保數據落盤,此時也可以打個快照,如果後面擴容出問題,還可以利用快照進行恢復。
- 對最後一個分區進行擴大
$ sudo fdisk /dev/nbd0

Welcome to fdisk (util-linux 2.34).
Changes will remain in memory only, until you decide to write them.
Be careful before using the write command.


Command (m for help): p
Disk /dev/nbd0: 100 GiB, 107374182400 bytes, 209715200 sectors
Units: sectors of 1 * 512 = 512 bytes
Sector size (logical/physical): 512 bytes / 512 bytes
I/O size (minimum/optimal): 512 bytes / 512 bytes
Disklabel type: dos
Disk identifier: 0xdfc90da8

Device      Boot   Start      End Sectors  Size Id Type
/dev/nbd0p1 *       2048  1230847 1228800  600M  6 FAT16
/dev/nbd0p2      1230848  3327999 2097152    1G 83 Linux
/dev/nbd0p3      3328000 12582911 9254912  4.4G 83 Linux

# 刪除最後一個分區3
Command (m for help): d
Partition number (1-3, default 3): 3

Partition 3 has been deleted.

# 創建新分區,用預設設置
Command (m for help): n
Partition type
   p   primary (2 primary, 0 extended, 2 free)
   e   extended (container for logical partitions)
Select (default p): p
Partition number (3,4, default 3): 3
First sector (3328000-209715199, default 3328000):
Last sector, +/-sectors or +/-size{K,M,G,T,P} (3328000-209715199, default 209715199):

Created a new partition 3 of type 'Linux' and of size 98.4 GiB.
Partition #3 contains a ext4 signature.

# 這裡比較重要,因為我們還需要保留原來分區3的內容,這裡選擇N
Do you want to remove the signature? [Y]es/[N]o: N

# 查看分區是否修改成功
Command (m for help): p
Disk /dev/nbd0: 100 GiB, 107374182400 bytes, 209715200 sectors
Units: sectors of 1 * 512 = 512 bytes
Sector size (logical/physical): 512 bytes / 512 bytes
I/O size (minimum/optimal): 512 bytes / 512 bytes
Disklabel type: dos
Disk identifier: 0xdfc90da8

Device      Boot   Start       End   Sectors  Size Id Type
/dev/nbd0p1 *       2048   1230847   1228800  600M  6 FAT16
/dev/nbd0p2      1230848   3327999   2097152    1G 83 Linux
/dev/nbd0p3      3328000 209715199 206387200 98.4G 83 Linux


# 將修改寫入磁碟
Command (m for help): w

The partition table has been altered.
Calling ioctl() to re-read partition table.
Syncing disks.
分區擴大完畢後,文件系統也需要進行調整,否則文件系統還是原來的大小。
- 檢查文件系統錯誤(否則resize2fs會報錯)
$ sudo e2fsck -f /dev/nbd0p3
e2fsck 1.45.5 (07-Jan-2020)
/dev/nbd0p3 has unsupported feature(s): FEATURE_C12
e2fsck: Get a newer version of e2fsck!

/dev/nbd0p3: ********** WARNING: Filesystem still has errors **********
報錯了,提示說我們這個文件系統開啟了比較新的特性,當前這個版本的e2fsck不支持,需要使用新版本的工具。這個工具的源碼在:https://git.kernel.org/pub/scm/fs/ext2/e2fsprogs.git/
下載後使用下麵的命令配置、編譯和安裝:
$ cd e2fsprogs/
$ ./configure --prefix=`pwd`/install
$ make -j8
$ make install
使用新編譯的工具檢查文件系統:
$ sudo ./e2fsprogs/install/sbin/e2fsck -f /dev/nbd0p3
e2fsck 1.47.0 (5-Feb-2023)
Pass 1: Checking inodes, blocks, and sizes
Pass 2: Checking directory structure
Pass 3: Checking directory connectivity
Pass 4: Checking reference counts
Pass 5: Checking group summary information
/dev/nbd0p3: 41952/289728 files (0.2% non-contiguous), 485030/1156864 blocks
- 擴大文件系統
$ sudo ./e2fsprogs/install/sbin/resize2fs -f /dev/nbd0p3
resize2fs 1.47.0 (5-Feb-2023)
Resizing the filesystem on /dev/nbd0p3 to 25798400 (4k) blocks.
The filesystem on /dev/nbd0p3 is now 25798400 (4k) blocks long.
- 檢查文件系統是否擴大成功
$ sudo mount /dev/nbd0p3 ./mnt/                                                                                                                                                 [0/0]
pengdl@pengdl-HP:~/Soft/repeat$ ls mnt/
afs  bin  boot  dev  etc  home  lib  lib64  lost+found  media  mnt  opt  proc  root  run  sbin  srv  sys  tmp  usr  var

$ df -hT .
Filesystem     Type  Size  Used Avail Use% Mounted on
/dev/nbd0p3    ext4   97G  1.8G   91G   2% /home/pengdl/Soft/repeat/mnt
看到上面的結果,表示擴容成功了。
- 解除跟nbd設備的綁定
$ sudo qemu-nbd -d /dev/nbd0
/dev/nbd0 disconnected
- 打個快照
$ qemu-img snapshot -c init_version ./fedora39_arm64.qcow2
$ qemu-img snapshot -l ./fedora39_arm64.qcow2
Snapshot list:
ID        TAG               VM SIZE                DATE     VM CLOCK     ICOUNT
1         init_version          0 B 2024-03-27 14:53:53 00:00:00.000          0
啟動虛擬機
得到最後改成得到的虛擬機鏡像fedora39_arm64.qcow2,然後就可以啟動虛擬機了,命令如下:
sudo virt-install \
        --name fedora39_arm64 \
        --virt-type qemu \
        --ram 4096 \
        --disk path=/home/pengdl/Soft/repeat/fedora39_arm64.qcow2,cache=none \
        --nographics \
        --import \
        --arch aarch64 \
        --vcpus 4
等待一會,會出現配置界面,可以在這裡創建用戶名、密碼等:
[  OK  ] Reached target nss-user-lookup.target - User and Group Name Lookups.
         Starting systemd-homed.service - Home Area Manager...
         Starting systemd-logind.service - User Login Management...
[  OK  ] Finished dracut-shutdown.service - Restore /run/initramfs on shutdown.
================================================================================
================================================================================

1) [x] Language settings                 2) [x] Time settings
       (English (United States))                (US/Eastern timezone)
3) [x] Network configuration             4) [x] Root password
       (Connected: enp1s0)                      (Root account is disabled)
5) [ ] User creation
       (No user will be created)


Please make a selection from the above ['c' to continue, 'q' to quit, 'r' to
refresh]:
5
================================================================================
================================================================================

User creation

1) [ ] Create user

Please make a selection from the above ['c' to continue, 'q' to quit, 'r' to
refresh]:
1
================================================================================
================================================================================

User creation

1) [x] Create user
2) Full name
3) User name
4) [x] Use password
5) Password
6) [x] Administrator
7) Groups
   wheel

Please make a selection from the above ['c' to continue, 'q' to quit, 'r' to
refresh]:
3
================================================================================
================================================================================

Enter a new value for 'User name' and press ENTER:
pengdl
================================================================================
================================================================================

User creation

1) [x] Create user
2) Full name
3) User name
   pengdl
4) [x] Use password
5) Password
6) [x] Administrator
7) Groups
   wheel

Please make a selection from the above ['c' to continue, 'q' to quit, 'r' to
refresh]:
5
================================================================================
================================================================================

Password:
Password (confirm):
================================================================================
================================================================================
Question

The password you have provided is weak: The password fails the dictionary check
- it is too simplistic/systematic
Would you like to use it anyway?


Please respond 'yes' or 'no':
yes
================================================================================
================================================================================

User creation

1) [x] Create user
2) Full name
3) User name
   pengdl
4) [x] Use password
5) Password
   Password set.
6) [x] Administrator
7) Groups
   wheel

Please make a selection from the above ['c' to continue, 'q' to quit, 'r' to
refresh]:
c
================================================================================
================================================================================

1) [x] Language settings                 2) [x] Time settings
       (English (United States))                (US/Eastern timezone)
3) [x] Network configuration             4) [x] Root password
       (Connected: enp1s0)                      (Root account is disabled)
5) [x] User creation
       (Administrator pengdl will be
       created)


Please make a selection from the above ['c' to continue, 'q' to quit, 'r' to
refresh]:
c
[  OK  ] Finished initial-setup.service - Initial Setup configuration program.
[  OK  ] Reached target getty-pre.target - Preparation for Logins.
[  OK  ] Started [email protected] - Getty on tty1.
[  OK  ] Started [email protected] - Serial Getty on ttyAMA0.
[  OK  ] Reached target getty.target - Login Prompts.
[  OK  ] Reached target multi-user.target - Multi-User System.
         Starting systemd-update-utmp-runle…- Record Runlevel Change in UTMP...
[  OK  ] Finished systemd-update-utmp-runle…e - Record Runlevel Change in UTMP.

Fedora Linux 39 (Thirty Nine)
Kernel 6.5.6-300.fc39.aarch64 on an aarch64 (ttyAMA0)

fedora login: pengdl
Password:
[pengdl@fedora ~]$
確認系統信息
# 發行版
[pengdl@fedora ~]$ cat /etc/redhat-release
Fedora release 39 (Thirty Nine)

# 內核版本
[pengdl@fedora ~]$ cat /proc/version
Linux version 6.5.6-300.fc39.aarch64 (mockbuild@f67da981c3f1401b99e509796f7601de) (gcc (GCC) 13.2.1 20230918 (Red Hat 13.2.1-3), GNU ld version 2.40-13.fc39) #1 SMP PREEMPT_DYNAMIC Fri Oct  6 19:36:57 UTC 2023

# 文件系統掛載信息
[pengdl@fedora ~]$ df -hT
Filesystem     Type      Size  Used Avail Use% Mounted on
/dev/vda3      ext4       97G  1.8G   91G   2% /
devtmpfs       devtmpfs  4.0M     0  4.0M   0% /dev
tmpfs          tmpfs     2.0G     0  2.0G   0% /dev/shm
efivarfs       efivarfs  256K   13K  244K   5% /sys/firmware/efi/efivars
tmpfs          tmpfs     780M  804K  779M   1% /run
tmpfs          tmpfs     2.0G   20K  2.0G   1% /tmp
/dev/vda2      ext4      974M  129M  778M  15% /boot
/dev/vda1      vfat      599M   35M  564M   6% /boot/efi
tmpfs          tmpfs     390M  4.0K  390M   1% /run/user/1000

# 磁碟分區
[pengdl@fedora ~]$ lsblk
NAME   MAJ:MIN RM  SIZE RO TYPE MOUNTPOINTS
zram0  251:0    0  3.8G  0 disk [SWAP]
vda    252:0    0  100G  0 disk
├─vda1 252:1    0  600M  0 part /boot/efi
├─vda2 252:2    0    1G  0 part /boot
└─vda3 252:3    0 98.4G  0 part /

# CPU信息
[pengdl@fedora ~]$ lscpu
Architecture:            aarch64
  CPU op-mode(s):        32-bit, 64-bit
  Byte Order:            Little Endian
CPU(s):                  4
  On-line CPU(s) list:   0-3
Vendor ID:               ARM
  Model name:            Cortex-A57
    Model:               0
    Thread(s) per core:  1
    Core(s) per cluster: 4
    Socket(s):           -
    Cluster(s):          1
    Stepping:            r1p0
    BogoMIPS:            125.00
    Flags:               fp asimd evtstrm aes pmull sha1 sha2 crc32 cpuid
NUMA:
  NUMA node(s):          1
  NUMA node0 CPU(s):     0-3
Vulnerabilities:
  Gather data sampling:  Not affected
  Itlb multihit:         Not affected
  L1tf:                  Not affected
  Mds:                   Not affected
  Meltdown:              Not affected
  Mmio stale data:       Not affected
  Retbleed:              Not affected
  Spec rstack overflow:  Not affected
  Spec store bypass:     Vulnerable
  Spectre v1:            Mitigation; __user pointer sanitization
  Spectre v2:            Vulnerable
  Srbds:                 Not affected
  Tsx async abort:       Not affected
關閉
$ sudo poweroff
...
[  OK  ] Stopped systemd-remount-fs.service…mount Root and Kernel File Systems.
[  OK  ] Stopped systemd-fsck-root.service - File System Check on Root Device.
[  OK  ] Stopped systemd-tmpfiles-setup-dev…ic Device Nodes in /dev gracefully.
         Stopping systemd-zram-setup@zram0.…vice - Create swap on /dev/zram0...
[  OK  ] Stopped [email protected] - Create swap on /dev/zram0.
[  OK  ] Removed slice system-systemd\x2dzr…- Slice /system/systemd-zram-setup.
[  OK  ] Stopped lvm2-monitor.service - Mon…using dmeventd or progress polling.
[  OK  ] Reached target shutdown.target - System Shutdown.
[  OK  ] Reached target final.target - Late Shutdown Services.
[  OK  ] Finished systemd-poweroff.service - System Power Off.
[  OK  ] Reached target poweroff.target - System Power Off.
[  670.116621] reboot: Power down

Domain creation completed.
You can restart your domain by running:
  virsh --connect qemu:///system start fedora39_arm64
通過virt-manager修改虛擬機信息
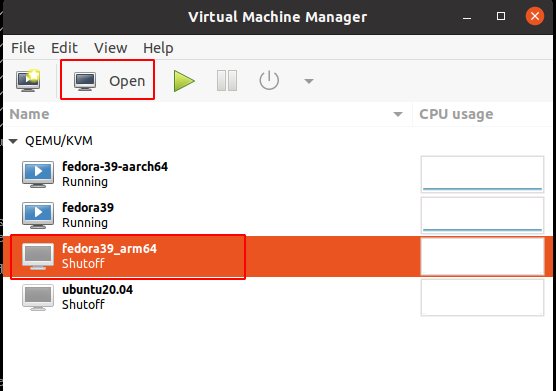
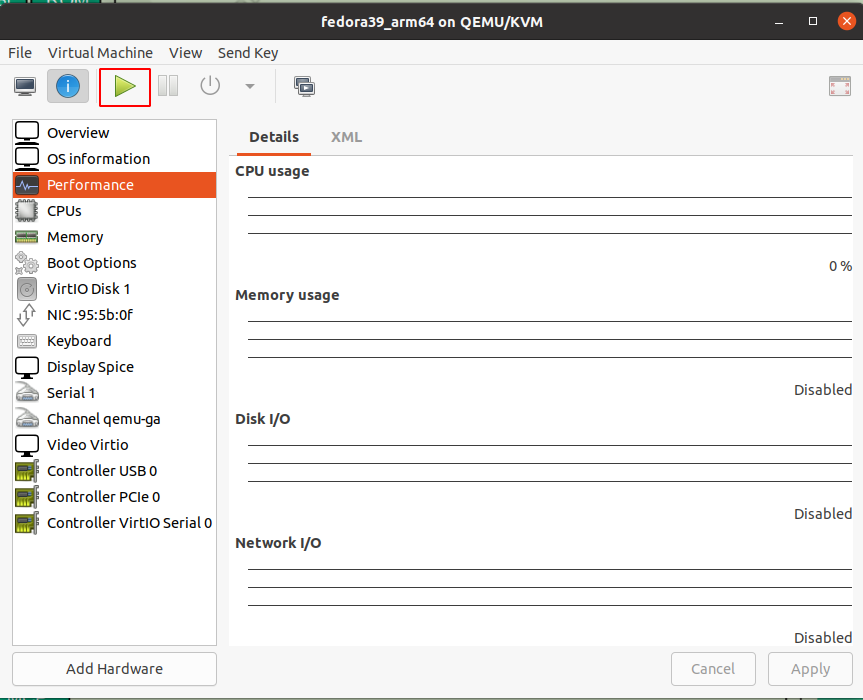
進入virt-manger的配置界面,打開我們剛纔安裝的虛擬機:fedora39_arm64
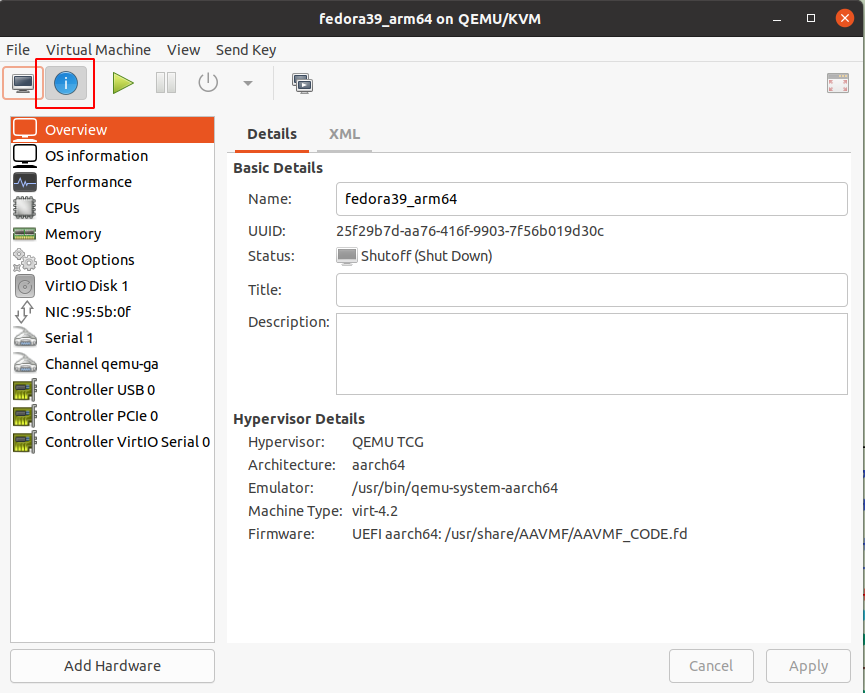
打開後,點擊查看虛擬機的硬體詳細配置信息:
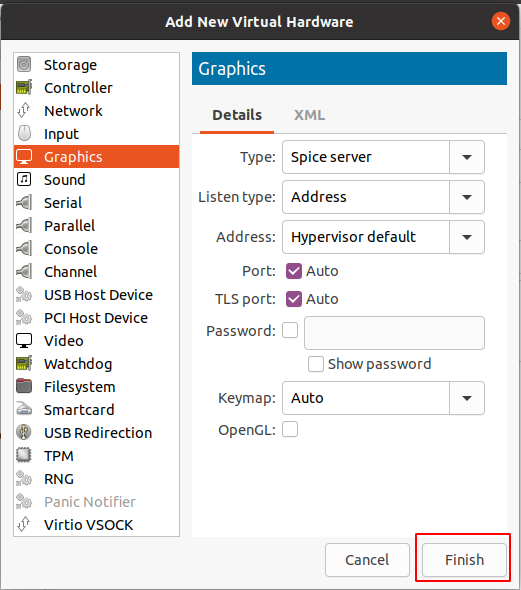
添加顯示設備和輸入設備:
- 鍵盤

- 顯示器
通過virt-manager啟動虛擬機
- 啟動
- 切到Graphic Console界面
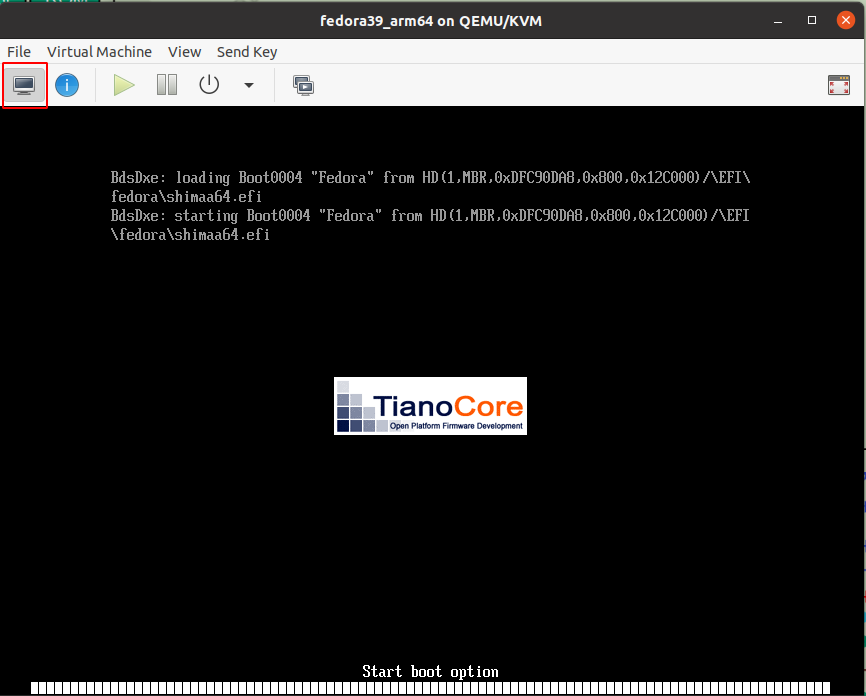
等待一會,會出現登錄提示:
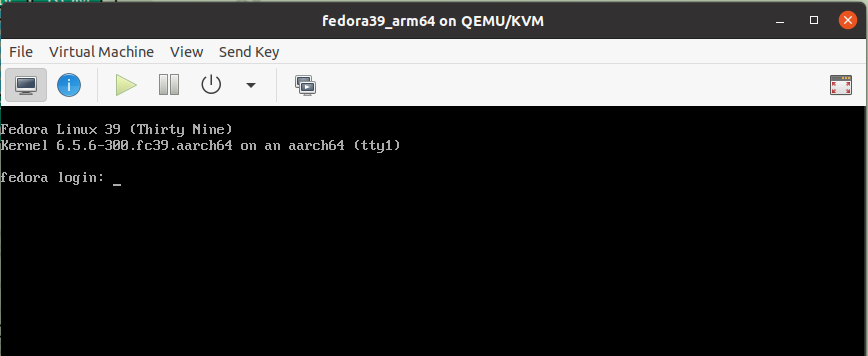
輸入用戶名和密碼

後續可以配置ssh登錄。
完。
本文來自博客園,作者:摩斯電碼,未經同意,禁止轉載

