
前言 IdentityServer4 是為ASP.NET Core系列量身打造的一款基於 OpenID Connect 和 OAuth 2.0 認證的框架 IdentityServer4官方文檔:https://identityserver4.readthedocs.io/ 看這篇文章前預設你對Id ...
前言
IdentityServer4 是為ASP.NET Core系列量身打造的一款基於 OpenID Connect 和 OAuth 2.0 認證的框架
IdentityServer4官方文檔:https://identityserver4.readthedocs.io/
看這篇文章前預設你對IdentityServer4 已經有一些瞭解。
本篇使用IdentityServer4的4.x版本,跟老版本的稍微有些差別。下麵直接進入正題。
鑒權中心
創建IdentityServer4項目
使用IdentityServer4 來搭建一個鑒權中心,首先建議安裝一下IdentityServer4的官方項目模板。也可以不安裝,自己創建項目,然後NuGet安裝需要的包也行。(不過還是推薦用官方的模板,很方便)。
命令行執行:dotnet new -i IdentityServer4.Templates
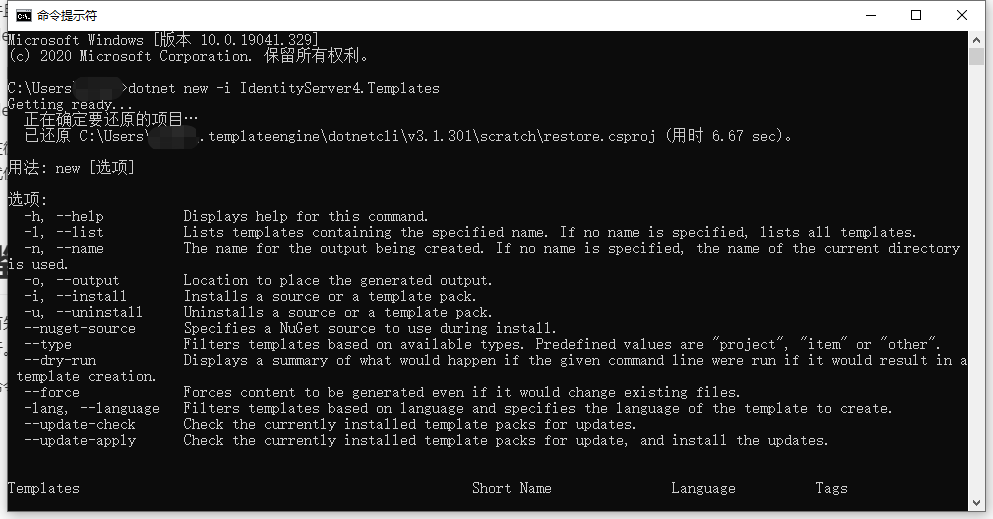
安裝完成後會多出以下項目模板:

我這裡選用is4inmem這個模板來創建項目,這個模板的數據都是寫死在記憶體中的,並且包含了Quickstart頁面,比較簡單方便。
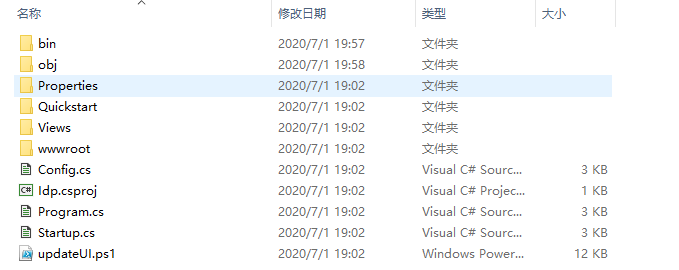
來到我的項目目錄下執行:dotnet new is4inmem --name Idp

執行完成會生成以下文件:
VS2019打開項目:
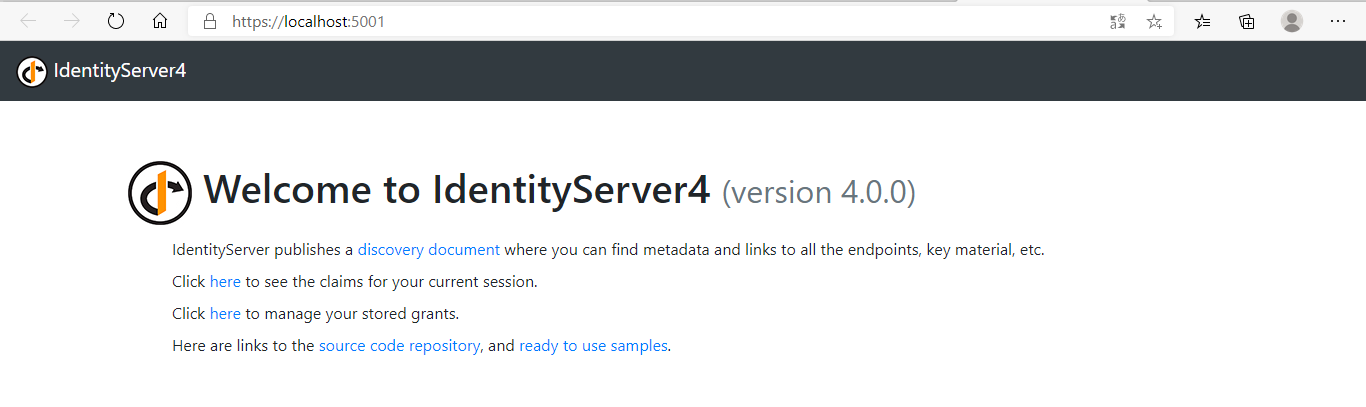
運行項目:
配置ApiResource、ApiScope、Clients
修改Startup:
// in-memory, code config
builder.AddInMemoryIdentityResources(Config.IdentityResources);
builder.AddInMemoryApiScopes(Config.ApiScopes);
//添加API資源
builder.AddInMemoryApiResources(Config.ApiResources);
builder.AddInMemoryClients(Config.Clients);
這裡比之前版本多了一個添加ApiScopes的方法:
builder.AddInMemoryApiScopes(Config.ApiScopes);
因為我接下來有要保護的API資源,所以需要添加一行:
builder.AddInMemoryApiResources(Config.ApiResources);
Config中的代碼:
public static class Config
{
    public static IEnumerable<IdentityResource> IdentityResources =>
        new IdentityResource[]
        {
            new IdentityResources.OpenId(),
            new IdentityResources.Profile(),
        };

    public static IEnumerable<ApiScope> ApiScopes =>
        new ApiScope[]
        {
            new ApiScope("scope1"),
            //new ApiScope("scope2"),
        };

    public static IEnumerable<ApiResource> ApiResources =>
        new ApiResource[]
        {
            new ApiResource("api1","#api1")
            {
                //!!!重要
                Scopes = { "scope1"}
            },
            //new ApiResource("api2","#api2")
            //{
            //    //!!!重要
            //    Scopes = { "scope2"}
            //},
        };

    public static IEnumerable<Client> Clients =>
        new Client[]
        {
            new Client
            {
                ClientId = "postman client",
                ClientName = "Client Credentials Client",

                AllowedGrantTypes = GrantTypes.ClientCredentials,
                ClientSecrets = { new Secret("postman secret".Sha256()) },

                AllowedScopes = { "scope1" }
            },
        };
}
我添加了一個ID為postman client的客戶端,授權模式就用最簡單的ClientCredentials客戶端模式。需要註意的是4.x版本的ApiScope和ApiResource是分開配置的,然後在ApiResource中一定要添加Scopes。如果你在網上搜的IdentityServer4教程比較老的,都是沒有這個ApiScope的,預設ApiResource的Name作為Scope。類似這樣:
public static IEnumerable<ApiResource> ApiResources =>
        new ApiResource[]
        {
            new ApiResource("api1","#api1"),//錯誤
            new ApiResource("api2","#api2"),//錯誤
        };


public static IEnumerable<Client> Clients =>
        new Client[]
        {
            new Client
            {
                ......

                AllowedScopes = { "api1", "api2" }
            },
        };
如果你這麼寫的話,雖然不影響你獲取token,但是你訪問api資源的話,永遠會得到一個401錯誤!!!
Audience validation failed. Audiences: 'xxx, http://xxx/resources'. Did not match: validationParameters.ValidAudience: 'xxx' or validationParameters.ValidAudiences: 'null'.
ApiResource
下麵添加一個api1資源,新建asp.netcore web應用並使用webapi模板:
NuGet安裝:Microsoft.AspNetCore.Authentication.JwtBearer
Startup部分代碼:
public void ConfigureServices(IServiceCollection services)
{
    services.AddControllers();

    services.AddAuthentication(JwtBearerDefaults.AuthenticationScheme)
        .AddJwtBearer(options =>
        {
            //IdentityServer地址
            options.Authority = "http://localhost:5001";
            //對應Idp中ApiResource的Name
            options.Audience = "api1";
            //不使用https
 		    options.RequireHttpsMetadata = false;
        });
}

// This method gets called by the runtime. Use this method to configure the HTTP request pipeline.
public void Configure(IApplicationBuilder app, IWebHostEnvironment env)
{
    if (env.IsDevelopment())
    {
        app.UseDeveloperExceptionPage();
    }

    app.UseHttpsRedirection();

    app.UseRouting();

    //身份驗證
    app.UseAuthentication();

    //授權
    app.UseAuthorization();

    app.UseEndpoints(endpoints =>
    {
        endpoints.MapControllers();
    });
}
給WeatherForecastController添加[Authorize]標記:

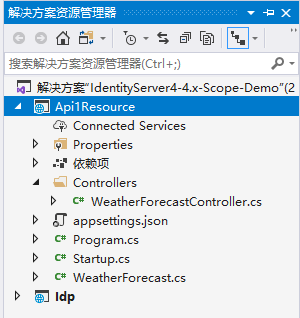
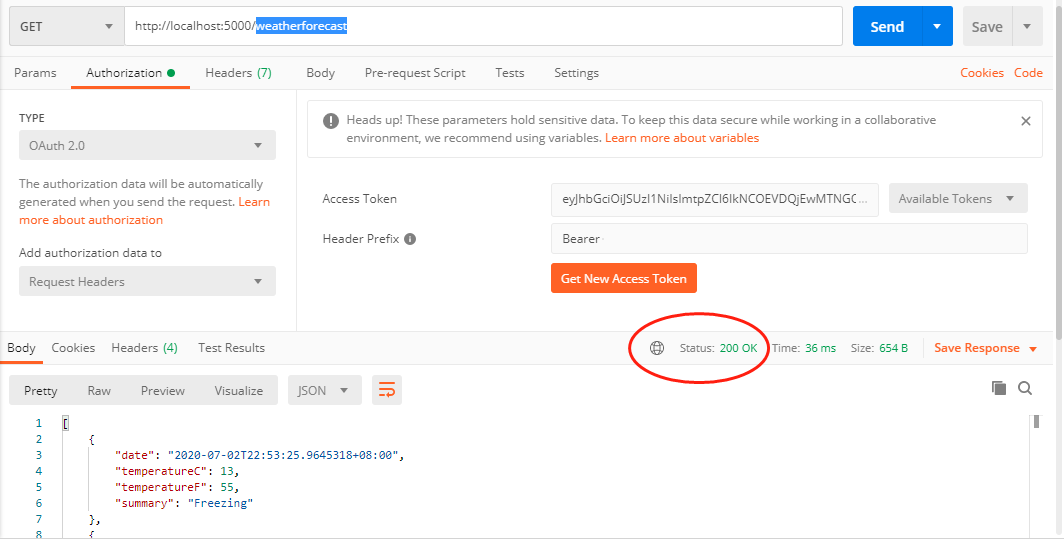
運行Api1Resource,用postman測試訪問weatherforecast介面:
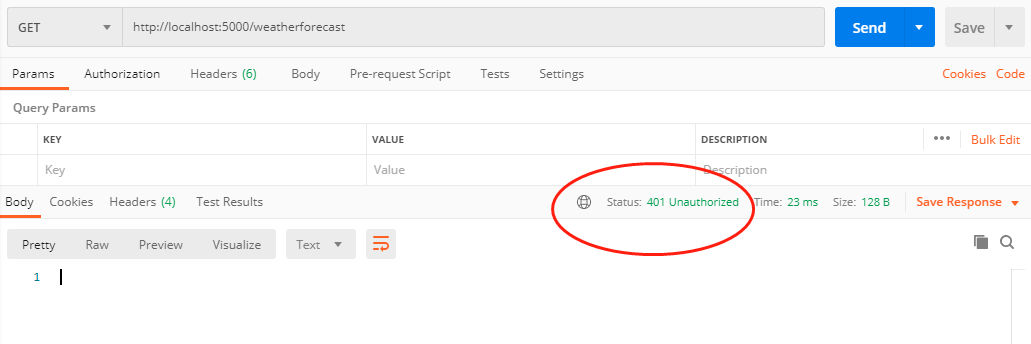
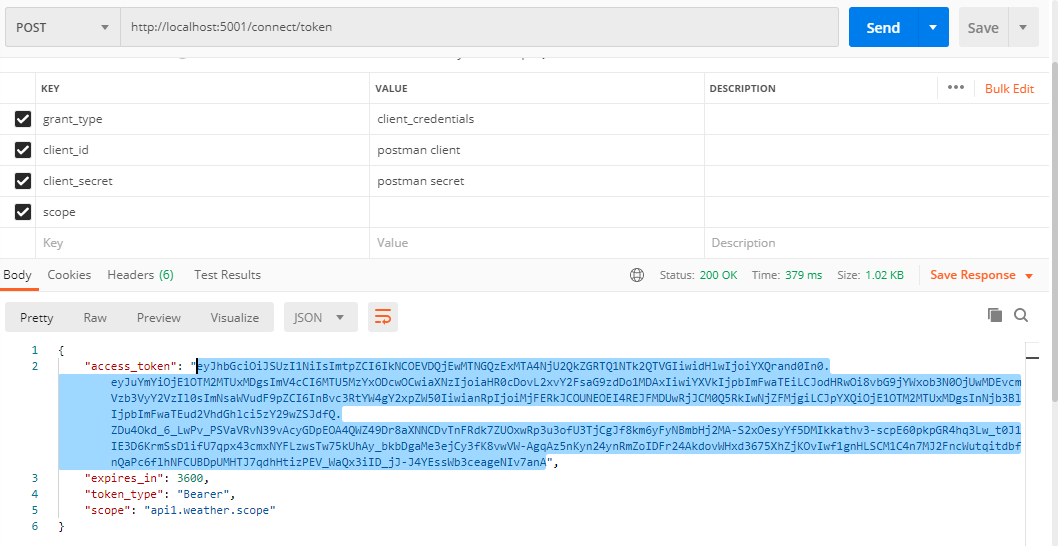
此時得到401錯誤。下麵先去Idp獲取一個token:
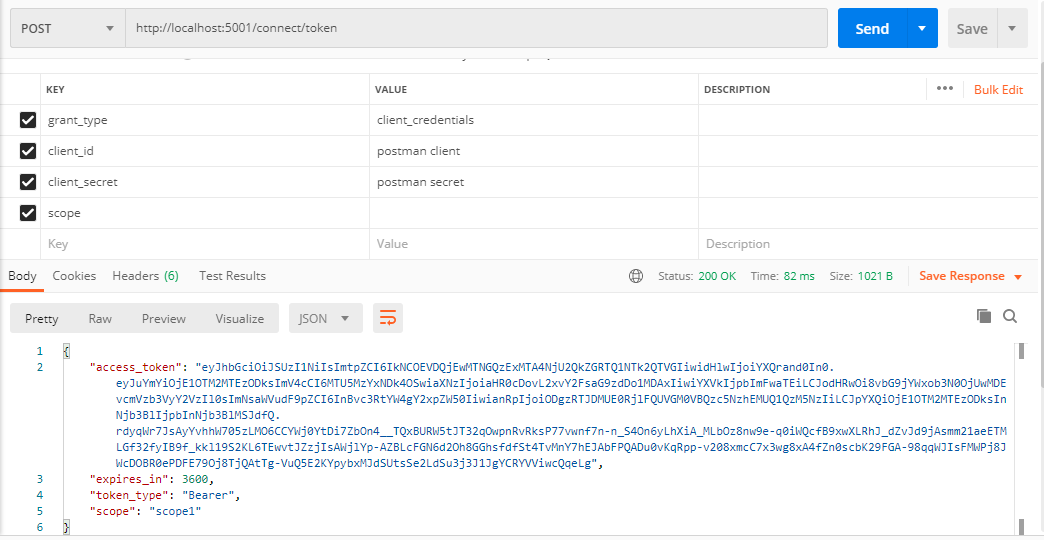
拿到token後再去訪問weatherforecast就沒問題了:
進行到這裡,好像跟scope都沒什麼關係,那麼scope到底有什麼用處呢?
ApiScope策略授權
繼續修改代碼。
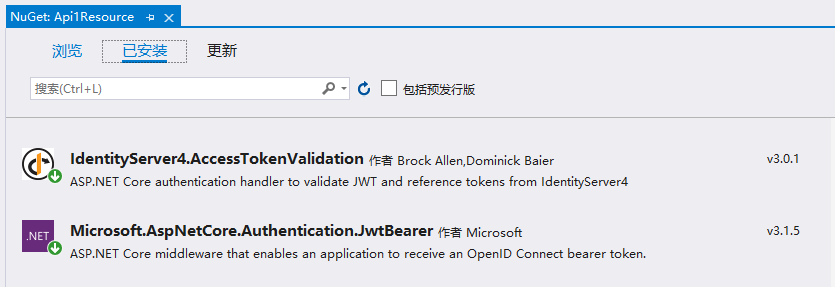
Api1Resource項目NuGet安裝:IdentityServer4.AccessTokenValidation
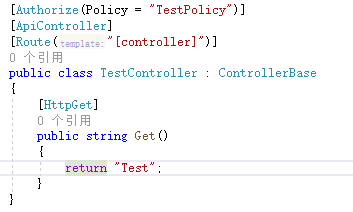
再新建一個TestController用於區分:

下麵我需要做的是使用scope結合策略授權來分別限制TestController和WeatherForecastController的訪問許可權。
修改Startup:
public void ConfigureServices(IServiceCollection services)
{
    ......

    services.AddAuthorization(options =>
    {
        //基於策略授權
        options.AddPolicy("WeatherPolicy", builder =>
        {
            //客戶端Scope中包含api1.weather.scope才能訪問
            builder.RequireScope("api1.weather.scope");
        });
        //基於策略授權
        options.AddPolicy("TestPolicy", builder =>
        {
            //客戶端Scope中包含api1.test.scope才能訪問
            builder.RequireScope("api1.test.scope");
        });
    });
}
為了好理解,我把scope名稱分別改成了:api1.weather.scope和api1.test.scope。
WeatherForecastController的Authorize標記修改一下:[Authorize(Policy = "WeatherPolicy")]
TestController的代碼很簡單:
因為修改了scope名稱,需要把Idp中的scope名稱也改一下:
public static IEnumerable<ApiScope> ApiScopes =>
    new ApiScope[]
    {
        new ApiScope("api1.weather.scope"),
        new ApiScope("api1.test.scope"),
        //new ApiScope("scope2"),
    };

public static IEnumerable<ApiResource> ApiResources =>
    new ApiResource[]
    {
        new ApiResource("api1","#api1")
        {
            //!!!重要
            Scopes = { "api1.weather.scope", "api1.test.scope" }
        },
        //new ApiResource("api2","#api2")
        //{
        //    //!!!重要
        //    Scopes = { "scope2"}
        //},
    };
客戶端定義,AllowedScopes暫時只給一個api1.weather.scope測試一下
public static IEnumerable<Client> Clients =>
            new Client[]
            {
                new Client
                {
                    ClientId = "postman client",
                    ClientName = "Client Credentials Client",

                    AllowedGrantTypes = GrantTypes.ClientCredentials,
                    ClientSecrets = { new Secret("postman secret".Sha256()) },

                    AllowedScopes = { "api1.weather.scope" }
                },
            };
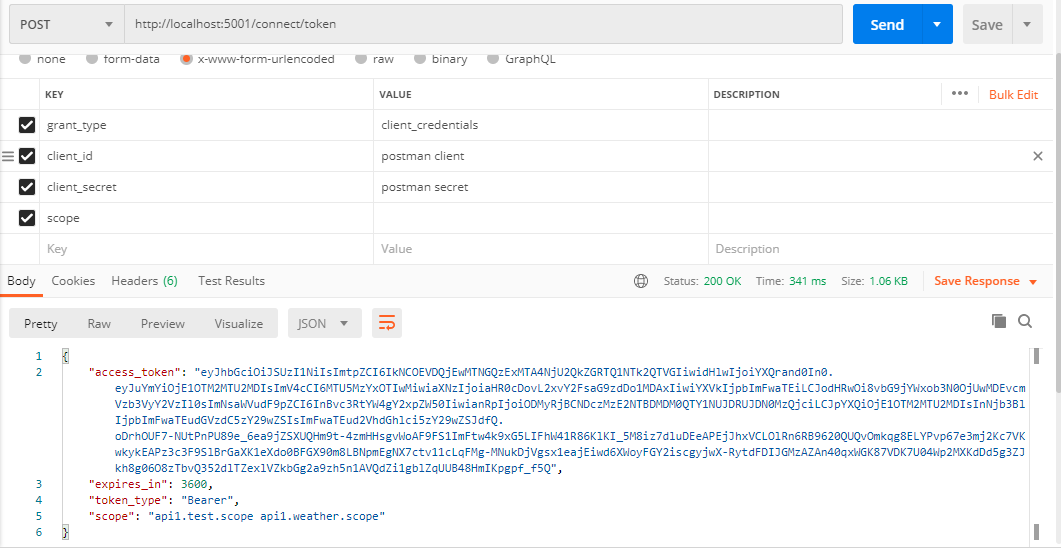
postman獲取token:
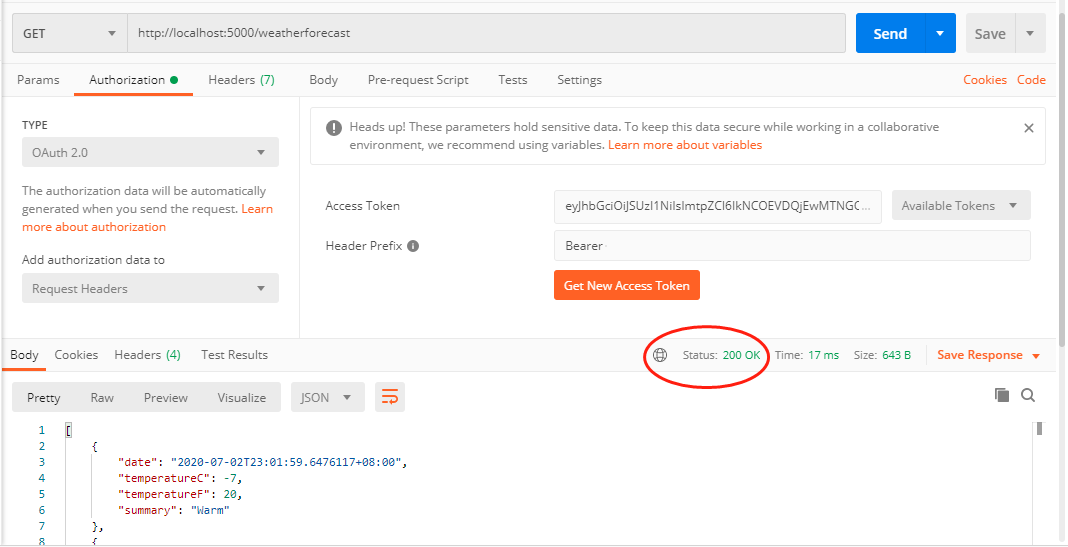
訪問weatherforecast介面,正常響應200。
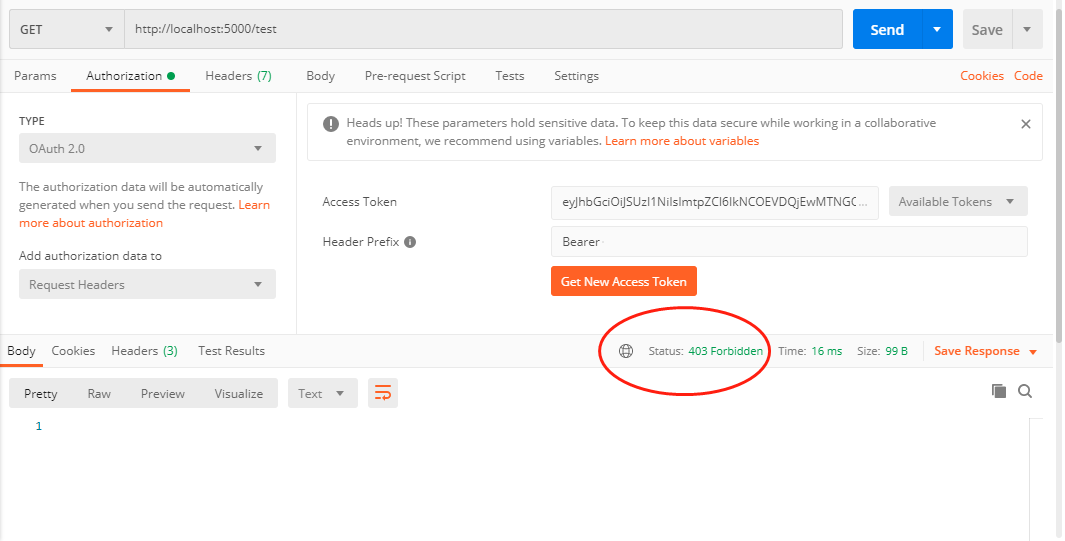
再訪問test,得到403錯誤:
接下來修改一下Idp的客戶端定義,添加api1.test.scope:
AllowedScopes = { "api1.weather.scope", "api1.test.scope" }
修改Idp後一定要重新獲取token,jwt就是這樣,一旦生成就無法改變。
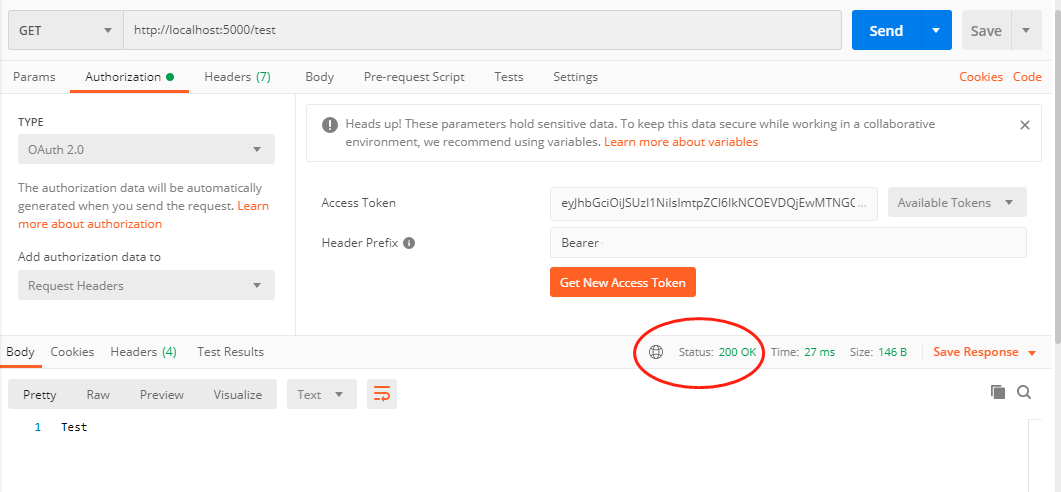
拿到新的token後訪問test和weatherforecast,這時候就都可以正常響應了。
總結
以上使用IdentityServer4搭建了一個鑒權中心,保護API資源,並使用ApiScope配合策略授權完成了一個簡單的許可權控制。IdentityServer4的玩法非常多,知識點也很多。強烈推薦B站的@solenovex 楊老師的視頻,地址:https://www.bilibili.com/video/BV16b411k7yM 多看幾遍,會有收穫。。。
需要代碼的點這裡:https://github.com/xiajingren/IdentityServer4-4.x-Scope-Demo


