
有時候我們使用python自動化框架的時候,打開一個網頁的時候,它會出現出線這一種登錄框,我們f12檢查不了,用開發者工具強制檢查裡面沒有任何屬性. 那這時候我們就可以用到python第三方庫:pyautogui PyAutoGUI:是一個Python庫,可用於自動化GUI(圖形用戶界面)程式的任務 ...
YOLOV5實時檢測屏幕
目錄註:此為筆記
目的:保留模型載入和推理部分,完成實時屏幕檢測
實現思路:
1. 寫一個實時截取屏幕的函數
2. 將截取的屏幕在視窗顯示出來
3. 用OpenCV繪製一個視窗用來顯示截取的屏幕
4. 在detect找出推理的代碼,推理完成後得到中心點的xy坐標,寬高組成box
5. 在創建的OpenCV視窗用得到的推理結果繪製方框
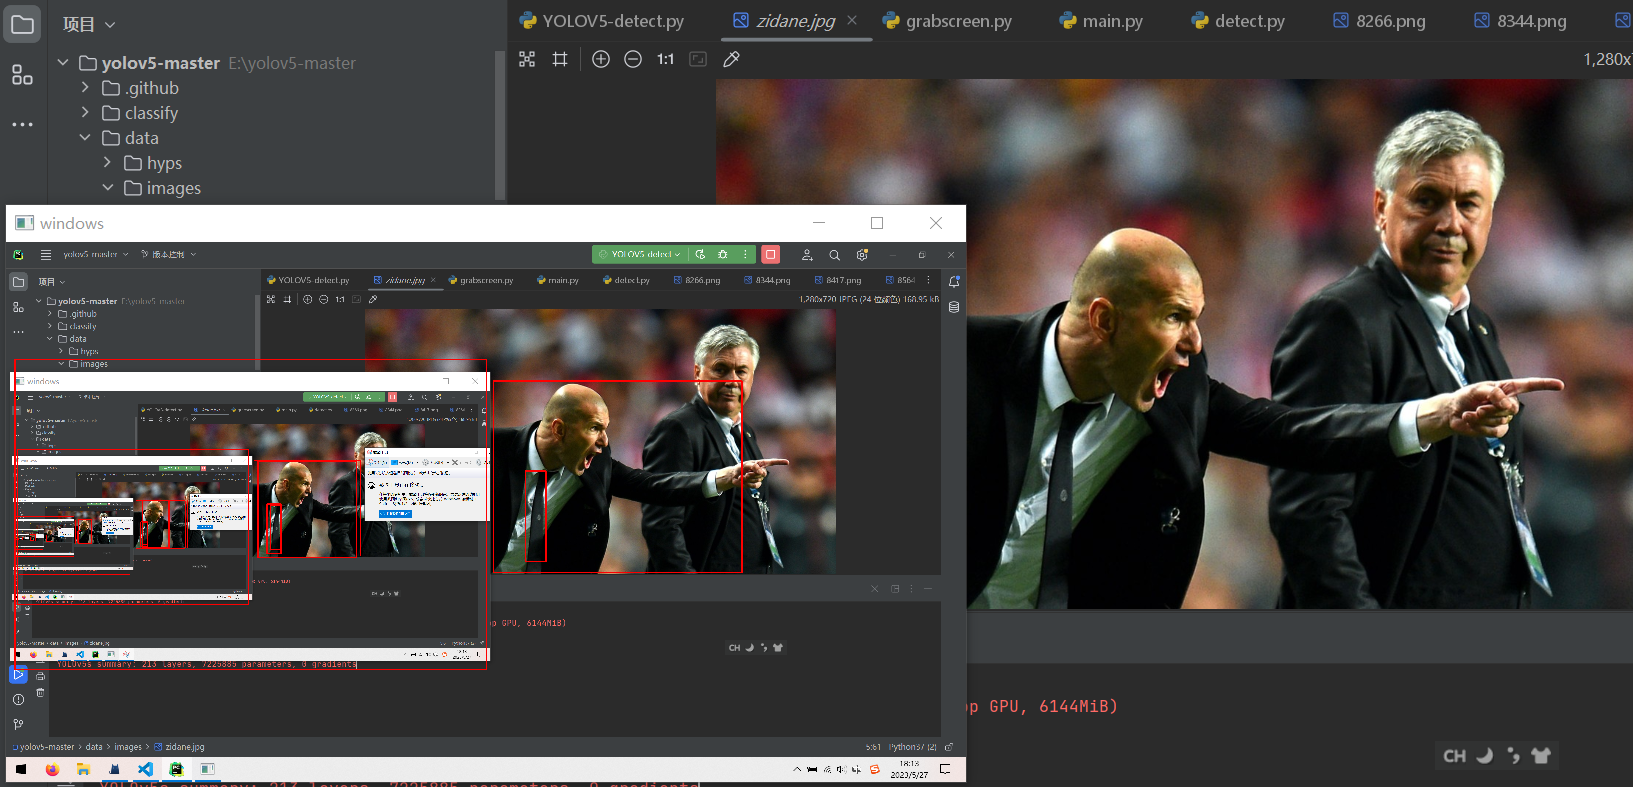
實現效果:
思考部分
先把原本的detect.py的代碼貼在這裡
import argparse
import os
import platform
import sys
from pathlib import Path

import torch

FILE = Path(__file__).resolve()
ROOT = FILE.parents[0]  # YOLOv5 root directory
if str(ROOT) not in sys.path:
    sys.path.append(str(ROOT))  # add ROOT to PATH
ROOT = Path(os.path.relpath(ROOT, Path.cwd()))  # relative

from models.common import DetectMultiBackend
from utils.dataloaders import IMG_FORMATS, VID_FORMATS, LoadImages, LoadScreenshots, LoadStreams
from utils.general import (LOGGER, Profile, check_file, check_img_size, check_imshow, check_requirements, colorstr, cv2,
                           increment_path, non_max_suppression, print_args, scale_boxes, strip_optimizer, xyxy2xywh)
from utils.plots import Annotator, colors, save_one_box
from utils.torch_utils import select_device, smart_inference_mode


@smart_inference_mode()
def run(
        weights=ROOT / 'yolov5s.pt',  # model path or triton URL
        source=ROOT / 'data/video/',
        data=ROOT / 'data/coco128.yaml',  # dataset.yaml path
        imgsz=(640, 640),  # inference size (height, width)
        conf_thres=0.25,  # confidence threshold
        iou_thres=0.45,  # NMS IOU threshold
        max_det=1000,  # maximum detections per image
        device='',  # cuda device, i.e. 0 or 0,1,2,3 or cpu
        view_img=False,  # show results
        save_txt=False,  # save results to *.txt
        save_conf=False,  # save confidences in --save-txt labels
        save_crop=False,  # save cropped prediction boxes
        nosave=False,  # do not save images/videos
        classes=None,  # filter by class: --class 0, or --class 0 2 3
        agnostic_nms=False,  # class-agnostic NMS
        augment=False,  # augmented inference
        visualize=False,  # visualize features
        update=False,  # update all models
        project=ROOT / 'runs/detect',  # save results to project/name
        name='exp',  # save results to project/name
        exist_ok=False,  # existing project/name ok, do not increment
        line_thickness=3,  # bounding box thickness (pixels)
        hide_labels=False,  # hide labels
        hide_conf=False,  # hide confidences
        half=False,  # use FP16 half-precision inference
        dnn=False,  # use OpenCV DNN for ONNX inference
        vid_stride=1,  # video frame-rate stride
):
    source = str(source)
    save_img = not nosave and not source.endswith('.txt')  # save inference images
    is_file = Path(source).suffix[1:] in (IMG_FORMATS + VID_FORMATS)
    is_url = source.lower().startswith(('rtsp://', 'rtmp://', 'http://', 'https://'))
    webcam = source.isnumeric() or source.endswith('.streams') or (is_url and not is_file)
    screenshot = source.lower().startswith('screen')
    if is_url and is_file:
        source = check_file(source)  # download

    # Directories
    save_dir = increment_path(Path(project) / name, exist_ok=exist_ok)  # increment run
    (save_dir / 'labels' if save_txt else save_dir).mkdir(parents=True, exist_ok=True)  # make dir

    # Load model
    device = select_device(device)
    model = DetectMultiBackend(weights, device=device, dnn=dnn, data=data, fp16=half)
    stride, names, pt = model.stride, model.names, model.pt
    imgsz = check_img_size(imgsz, s=stride)  # check image size

    # Dataloader
    bs = 1  # batch_size
    if webcam:
        view_img = check_imshow(warn=True)
        dataset = LoadStreams(source, img_size=imgsz, stride=stride, auto=pt, vid_stride=vid_stride)
        bs = len(dataset)
    elif screenshot:
        dataset = LoadScreenshots(source, img_size=imgsz, stride=stride, auto=pt)
    else:
        dataset = LoadImages(source, img_size=imgsz, stride=stride, auto=pt, vid_stride=vid_stride)
    vid_path, vid_writer = [None] * bs, [None] * bs

    # Run inference
    model.warmup(imgsz=(1 if pt or model.triton else bs, 3, *imgsz))  # warmup
    seen, windows, dt = 0, [], (Profile(), Profile(), Profile())
    for path, im, im0s, vid_cap, s in dataset:
        with dt[0]:
            im = torch.from_numpy(im).to(model.device)
            im = im.half() if model.fp16 else im.float()  # uint8 to fp16/32
            im /= 255  # 0 - 255 to 0.0 - 1.0
            if len(im.shape) == 3:
                im = im[None]  # expand for batch dim

        # Inference
        with dt[1]:
            visualize = increment_path(save_dir / Path(path).stem, mkdir=True) if visualize else False
            pred = model(im, augment=augment, visualize=visualize)

        # NMS
        with dt[2]:
            pred = non_max_suppression(pred, conf_thres, iou_thres, classes, agnostic_nms, max_det=max_det)

        # Second-stage classifier (optional)
        # pred = utils.general.apply_classifier(pred, classifier_model, im, im0s)

        # Process predictions
        for i, det in enumerate(pred):  # per image
            seen += 1
            if webcam:  # batch_size >= 1
                p, im0, frame = path[i], im0s[i].copy(), dataset.count
                s += f'{i}: '
            else:
                p, im0, frame = path, im0s.copy(), getattr(dataset, 'frame', 0)

            p = Path(p)  # to Path
            save_path = str(save_dir / p.name)  # im.jpg
            txt_path = str(save_dir / 'labels' / p.stem) + ('' if dataset.mode == 'image' else f'_{frame}')  # im.txt
            s += '%gx%g ' % im.shape[2:]  # print string
            gn = torch.tensor(im0.shape)[[1, 0, 1, 0]]  # normalization gain whwh
            imc = im0.copy() if save_crop else im0  # for save_crop
            annotator = Annotator(im0, line_width=line_thickness, example=str(names))
            if len(det):
                # Rescale boxes from img_size to im0 size
                det[:, :4] = scale_boxes(im.shape[2:], det[:, :4], im0.shape).round()

                # Print results
                for c in det[:, 5].unique():
                    n = (det[:, 5] == c).sum()  # detections per class
                    s += f"{n} {names[int(c)]}{'s' * (n > 1)}, "  # add to string

                # Write results
                for *xyxy, conf, cls in reversed(det):
                    if save_txt:  # Write to file
                        xywh = (xyxy2xywh(torch.tensor(xyxy).view(1, 4)) / gn).view(-1).tolist()  # normalized xywh
                        line = (cls, *xywh, conf) if save_conf else (cls, *xywh)  # label format
                        with open(f'{txt_path}.txt', 'a') as f:
                            f.write(('%g ' * len(line)).rstrip() % line + '\n')

                    if save_img or save_crop or view_img:  # Add bbox to image
                        c = int(cls)  # integer class
                        label = None if hide_labels else (names[c] if hide_conf else f'{names[c]} {conf:.2f}')
                        annotator.box_label(xyxy, label, color=colors(c, True))
                    if save_crop:
                        save_one_box(xyxy, imc, file=save_dir / 'crops' / names[c] / f'{p.stem}.jpg', BGR=True)

            # Stream results
            im0 = annotator.result()
            if view_img:
                if platform.system() == 'Linux' and p not in windows:
                    windows.append(p)
                    cv2.namedWindow(str(p), cv2.WINDOW_NORMAL | cv2.WINDOW_KEEPRATIO)  # allow window resize (Linux)
                    cv2.resizeWindow(str(p), im0.shape[1], im0.shape[0])
                cv2.imshow(str(p), im0)
                cv2.waitKey(1)  # 1 millisecond

            # Save results (image with detections)
            if save_img:
                if dataset.mode == 'image':
                    cv2.imwrite(save_path, im0)
                else:  # 'video' or 'stream'
                    if vid_path[i] != save_path:  # new video
                        vid_path[i] = save_path
                        if isinstance(vid_writer[i], cv2.VideoWriter):
                            vid_writer[i].release()  # release previous video writer
                        if vid_cap:  # video
                            fps = vid_cap.get(cv2.CAP_PROP_FPS)
                            w = int(vid_cap.get(cv2.CAP_PROP_FRAME_WIDTH))
                            h = int(vid_cap.get(cv2.CAP_PROP_FRAME_HEIGHT))
                        else:  # stream
                            fps, w, h = 30, im0.shape[1], im0.shape[0]
                        save_path = str(Path(save_path).with_suffix('.mp4'))  # force *.mp4 suffix on results videos
                        vid_writer[i] = cv2.VideoWriter(save_path, cv2.VideoWriter_fourcc(*'mp4v'), fps, (w, h))
                    vid_writer[i].write(im0)

        # Print time (inference-only)
        LOGGER.info(f"{s}{'' if len(det) else '(no detections), '}{dt[1].dt * 1E3:.1f}ms")

    # Print results
    t = tuple(x.t / seen * 1E3 for x in dt)  # speeds per image
    LOGGER.info(f'Speed: %.1fms pre-process, %.1fms inference, %.1fms NMS per image at shape {(1, 3, *imgsz)}' % t)
    if save_txt or save_img:
        s = f"\n{len(list(save_dir.glob('labels/*.txt')))} labels saved to {save_dir / 'labels'}" if save_txt else ''
        LOGGER.info(f"Results saved to {colorstr('bold', save_dir)}{s}")
    if update:
        strip_optimizer(weights[0])  # update model (to fix SourceChangeWarning)


def parse_opt():
    parser = argparse.ArgumentParser()
    parser.add_argument('--weights', nargs='+', type=str, default=ROOT / 'yolov5s.pt', help='model path or triton URL')
    parser.add_argument('--source', type=str, default=ROOT / '0', help='file/dir/URL/glob/screen/1(webcam)')
    parser.add_argument('--data', type=str, default=ROOT / 'data/coco128.yaml', help='(optional) dataset.yaml path')
    parser.add_argument('--imgsz', '--img', '--img-size', nargs='+', type=int, default=[640], help='inference size h,w')
    parser.add_argument('--conf-thres', type=float, default=0.45, help='confidence threshold')
    parser.add_argument('--iou-thres', type=float, default=0.2, help='NMS IoU threshold')
    parser.add_argument('--max-det', type=int, default=1000, help='maximum detections per image')
    parser.add_argument('--device', default='', help='cuda device, i.e. 0 or 0,1,2,3 or cpu')
    parser.add_argument('--view-img', action='store_true', help='show results')
    parser.add_argument('--save-txt', action='store_true', help='save results to *.txt')
    parser.add_argument('--save-conf', action='store_true', help='save confidences in --save-txt labels')
    parser.add_argument('--save-crop', action='store_true', help='save cropped prediction boxes')
    parser.add_argument('--nosave', action='store_true', help='do not save images/videos')
    parser.add_argument('--classes', nargs='+', type=int, help='filter by class: --classes 0, or --classes 0 2 3')
    parser.add_argument('--agnostic-nms', action='store_true', help='class-agnostic NMS')
    parser.add_argument('--augment', action='store_true', help='augmented inference')
    parser.add_argument('--visualize', action='store_true', help='visualize features')
    parser.add_argument('--update', action='store_true', help='update all models')
    parser.add_argument('--project', default=ROOT / 'runs/detect', help='save results to project/name')
    parser.add_argument('--name', default='exp', help='save results to project/name')
    parser.add_argument('--exist-ok', action='store_true', help='existing project/name ok, do not increment')
    parser.add_argument('--line-thickness', default=3, type=int, help='bounding box thickness (pixels)')
    parser.add_argument('--hide-labels', default=False, action='store_true', help='hide labels')
    parser.add_argument('--hide-conf', default=False, action='store_true', help='hide confidences')
    parser.add_argument('--half', action='store_true', help='use FP16 half-precision inference')
    parser.add_argument('--dnn', action='store_true', help='use OpenCV DNN for ONNX inference')
    parser.add_argument('--vid-stride', type=int, default=1, help='video frame-rate stride')
    opt = parser.parse_args()
    opt.imgsz *= 2 if len(opt.imgsz) == 1 else 1  # expand
    print_args(vars(opt))
    return opt


def main(opt):
    check_requirements(exclude=('tensorboard', 'thop'))
    run(**vars(opt))


if __name__ == '__main__':
    opt = parse_opt()
    main(opt)
分析代碼並刪減不用的部分
import argparse
import os
import platform
import sys
from pathlib import Path

import torch

FILE = Path(__file__).resolve()
ROOT = FILE.parents[0]  # YOLOv5 root directory
if str(ROOT) not in sys.path:
    sys.path.append(str(ROOT))  # add ROOT to PATH
ROOT = Path(os.path.relpath(ROOT, Path.cwd()))  # relative

from models.common import DetectMultiBackend
from utils.dataloaders import IMG_FORMATS, VID_FORMATS, LoadImages, LoadScreenshots, LoadStreams
from utils.general import (LOGGER, Profile, check_file, check_img_size, check_imshow, check_requirements, colorstr, cv2,
                           increment_path, non_max_suppression, print_args, scale_boxes, strip_optimizer, xyxy2xywh)
from utils.plots import Annotator, colors, save_one_box
from utils.torch_utils import select_device, smart_inference_mode
做了一些包的導入,定義了一些全局變數,先保留下來,沒用的最後刪
向下
if __name__ == '__main__':
    opt = parse_opt()
    main(opt)
從if __name__ == '__main__開始
opt = parse_opt 就是一個獲取命令行參數的函數,我們並不需要,可以刪
進入main函數
def main(opt):
    check_requirements(exclude=('tensorboard', 'thop'))
    run(**vars(opt))
check_requirements函數檢查requirements是否全都安裝好了,無用,刪了
進入run函數
    source = str(source)
    save_img = not nosave and not source.endswith('.txt')  # save inference images
    is_file = Path(source).suffix[1:] in (IMG_FORMATS + VID_FORMATS)
    is_url = source.lower().startswith(('rtsp://', 'rtmp://', 'http://', 'https://'))
    webcam = source.isnumeric() or source.endswith('.streams') or (is_url and not is_file)
    screenshot = source.lower().startswith('screen')
    if is_url and is_file:
        source = check_file(source)  # download

    # Directories
    save_dir = increment_path(Path(project) / name, exist_ok=exist_ok)  # increment run
    (save_dir / 'labels' if save_txt else save_dir).mkdir(parents=True, exist_ok=True)  # make dir
判斷source的類型,即要要推理的源是什麼,判斷源是文件還是url還是webcam或者screenshot ,定義保存文件夾,我不需要保存,只需要實時檢測屏幕,刪除
繼續向下,是載入模型的代碼
# Load model
device = select_device(device)
model = DetectMultiBackend(weights, device=device, dnn=dnn, data=data, fp16=half)
得知載入模型需要幾個參數,分別是weights, device=device, dnn=dnn, data=data, fp16=half
通過開始的形參可知:
weights=ROOT / 'yolov5s.pt'也就是模型的名稱device通過select_device函數得到dnn和fp16在run函數里的參數都是FALSE
故載入模型的代碼可以改寫成
def LoadModule():
    device = select_device('')
    weights = 'yolov5s.pt'
    model = DetectMultiBackend(weights, device=device, dnn=False, fp16=False)
    return model
繼續往下讀
 bs = 1  # batch_size
    if webcam:
        view_img = check_imshow(warn=True)
        dataset = LoadStreams(source, img_size=imgsz, stride=stride, auto=pt, vid_stride=vid_stride)
        bs = len(dataset)
    elif screenshot:
        dataset = LoadScreenshots(source, img_size=imgsz, stride=stride, auto=pt)
    else:
        dataset = LoadImages(source, img_size=imgsz, stride=stride, auto=pt, vid_stride=vid_stride)
    vid_path, vid_writer = [None] * bs, [None] * bs
這裡如果是使用網路攝像頭作為輸入,會通過LoadStreams類載入視頻流,根據圖像大小和步長採樣,如果使用截圖作為輸入,則通過LoadScreenshots載入截圖,都不是則通過LoadImages類載入圖片文件
這是YOLOV5提供的載入dataset的部分,我們可以添加自己的dataset,所以刪掉
繼續往下
# Run inference
    model.warmup(imgsz=(1 if pt or model.triton else bs, 3, *imgsz))  # warmup
    seen, windows, dt = 0, [], (Profile(), Profile(), Profile())
    for path, im, im0s, vid_cap, s in dataset:
        with dt[0]:
            im = torch.from_numpy(im).to(model.device)
            im = im.half() if model.fp16 else im.float()  # uint8 to fp16/32
            im /= 255  # 0 - 255 to 0.0 - 1.0
            if len(im.shape) == 3:
                im = im[None]  # expand for batch dim

        # Inference
        with dt[1]:
            visualize = increment_path(save_dir / Path(path).stem, mkdir=True) if visualize else False
            pred = model(im, augment=augment, visualize=visualize)

        # NMS
        with dt[2]:
            pred = non_max_suppression(pred, conf_thres, iou_thres, classes, agnostic_nms, max_det=max_det)

        # Second-stage classifier (optional)
        # pred = utils.general.apply_classifier(pred, classifier_model, im, im0s)

        # Process predictions
model.warmup(imgsz=(1 if pt or model.triton else bs, 3, *imgsz))
用於模型預熱,傳入形狀為(1, 3, *imgsz)的圖像進行預熱操作,沒用刪了
seen, windows, dt = 0, [], (Profile(), Profile(), Profile())
未知作用,刪了
for path, im, im0s, vid_cap, s in dataset:
        with dt[0]:
            im = torch.from_numpy(im).to(model.device)
            im = im.half() if model.fp16 else im.float()  # uint8 to fp16/32
            im /= 255  # 0 - 255 to 0.0 - 1.0
            if len(im.shape) == 3:
                im = im[None]  # expand for batch dim

        # Inference
        with dt[1]:
            visualize = increment_path(save_dir / Path(path).stem, mkdir=True) if visualize else False
            pred = model(im, augment=augment, visualize=visualize)

        # NMS
        with dt[2]:
            pred = non_max_suppression(pred, conf_thres, iou_thres, classes, agnostic_nms, max_det=max_det)
上面這段for迴圈用於遍曆數據集中的每個圖像或視頻幀進行推理,在迴圈的開頭,將路徑、圖像、原始圖像、視頻捕獲對象和步長傳遞給path, im, im0s, vid_cap, s。推理實時屏幕只需要傳一張圖片,所以不存在將遍歷推理,所以要進行改寫,改寫成
im = torch.from_numpy(im).to(model.device)
im = im.half() if model.fp16 else im.float()  # uint8 to fp16/32
im /= 255  # 0 - 255 to 0.0 - 1.0
if len(im.shape) == 3:
    im = im[None]  # expand for batch dim
visualize = increment_path(save_dir / Path(path).stem, mkdir=True) if visualize else False
pred = model(im, augment=augment, visualize=visualize)
pred = non_max_suppression(pred, conf_thres, iou_thres, classes, agnostic_nms, max_det=max_det)
這裡是對 im 進行轉換和推理,而改寫的代碼中沒有im變數,則尋找im的來源
for path, im, im0s, vid_cap, s in dataset:
im來源於dataset
dataset = LoadImages(source, img_size=imgsz, stride=stride, auto=pt, vid_stride=vid_stride)
dataset來源於LoadImages的返回值
查看LoadImages的函數返回值和返回值的來源
在dataloaders.py中可以看到
if self.transforms:
    im = self.transforms(im0)  # transforms
else:
    im = letterbox(im0, self.img_size, stride=self.stride, auto=self.auto)[0]  # padded resize
    im = im.transpose((2, 0, 1))[::-1]  # HWC to CHW, BGR to RGB
    im = np.ascontiguousarray(im)  # contiguous

return path, im, im0, self.cap, s
如果transforms存在,則轉換,如果transforms不存在,則調用letterbox函數對圖像im0進行縮放和填充,使其符合模型要求的圖像大小,將圖像的通道順序由HWC轉換為CHW,將圖像的通道順序由BGR轉換為RGB,將圖像轉換為連續的記憶體佈局
其中需要的參數是im0, self.img_size, stride=self.stride, auto=self.auto
im0則是未經處理的圖片,img_size填640(因為模型的圖片大小訓練的是640),stride填64(預設參數為64),auto填True
則得到改寫代碼為
im = letterbox(img0, 640, stride=32, auto=True)[0]  # padded resize
    im = im.transpose((2, 0, 1))[::-1]  # HWC to CHW, BGR to RGB
    im = np.ascontiguousarray(im)  # contiguous
    im = torch.from_numpy(im).to(model.device)
    im = im.half() if model.fp16 else im.float()  # uint8 to fp16/32
    im /= 255  # 0 - 255 to 0.0 - 1.0
    if len(im.shape) == 3:
        im = im[None]  # expand for batch dim
    pred = model(im, augment=False, visualize=False)
    pred = non_max_suppression(pred, conf_thres=conf_thres, iou_thres=iou_thres, classes=None, agnostic=False,
                               max_det=1000)
繼續向下
for i, det in enumerate(pred):  # per image
            seen += 1
            if webcam:  # batch_size >= 1
                p, im0, frame = path[i], im0s[i].copy(), dataset.count
                s += f'{i}: '
            else:
                p, im0, frame = path, im0s.copy(), getattr(dataset, 'frame', 0)

            p = Path(p)  # to Path
            save_path = str(save_dir / p.name)  # im.jpg
            txt_path = str(save_dir / 'labels' / p.stem) + ('' if dataset.mode == 'image' else f'_{frame}')  # im.txt
            s += '%gx%g ' % im.shape[2:]  # print string
            gn = torch.tensor(im0.shape)[[1, 0, 1, 0]]  # normalization gain whwh
            imc = im0.copy() if save_crop else im0  # for save_crop
            annotator = Annotator(im0, line_width=line_thickness, example=str(names))
            if len(det):
                # Rescale boxes from img_size to im0 size
                det[:, :4] = scale_boxes(im.shape[2:], det[:, :4], im0.shape).round()

                # Print results
                for c in det[:, 5].unique():
                    n = (det[:, 5] == c).sum()  # detections per class
                    s += f"{n} {names[int(c)]}{'s' * (n > 1)}, "  # add to string

                # Write results
                for *xyxy, conf, cls in reversed(det):
                    if save_txt:  # Write to file
                        xywh = (xyxy2xywh(torch.tensor(xyxy).view(1, 4)) / gn).view(-1).tolist()  # normalized xywh
                        line = (cls, *xywh, conf) if save_conf else (cls, *xywh)  # label format
                        with open(f'{txt_path}.txt', 'a') as f:
                            f.write(('%g ' * len(line)).rstrip() % line + '\n')

                    if save_img or save_crop or view_img:  # Add bbox to image
                        c = int(cls)  # integer class
                        label = None if hide_labels else (names[c] if hide_conf else f'{names[c]} {conf:.2f}')
                        annotator.box_label(xyxy, label, color=colors(c, True))
                    if save_crop:
                        save_one_box(xyxy, imc, file=save_dir / 'crops' / names[c] / f'{p.stem}.jpg', BGR=True)
這段代碼將推理後的結果進行轉換,轉換為label format,成為人能看懂的格式,刪去輸出結果,留下寫入結果中的,格式轉換,刪掉保存為txt文件,得到需要的box,然後自己寫一個boxs=[],將結果append進去,方便在OpenCV中繪畫識別方框,改寫結果為
boxs=[]
    for i, det in enumerate(pred):  # per image
        im0 = img0.copy()
        s = ' '
        s += '%gx%g ' % im.shape[2:]  # print string
        gn = torch.tensor(img0.shape)[[1, 0, 1, 0]]  # normalization gain whwh
        imc = img0  # for save_crop

        if len(det):
            # Rescale boxes from img_size to im0 size
            det[:, :4] = scale_boxes(im.shape[2:], det[:, :4], im0.shape).round()
            # Print results
            for c in det[:, 5].unique():
                n = (det[:, 5] == c).sum()  # detections per class
                s += f"{n} {names[int(c)]}{'s' * (n > 1)}, "  # add to string

        # Write results
        for *xyxy, conf, cls in reversed(det):
            xywh = (xyxy2xywh(torch.tensor(xyxy).view(1, 4)) / gn).view(-1).tolist()  # normalized xywh
            line = (cls, *xywh)  # label format
            box = ('%g ' * len(line)).rstrip() % line
            box = box.split(' ')
            boxs.append(box)
就此完成了推理部分的刪減和重寫
把屏幕的截圖通過OpenCV進行顯示
寫一個屏幕截圖的文件
寫成 grabscreen.py
# 文件名:grabscreen.py
import cv2
import numpy as np
import win32gui
import win32print
import win32ui
import win32con
import win32api
import mss


def grab_screen_win32(region):
    hwin = win32gui.GetDesktopWindow()
    left, top, x2, y2 = region
    width = x2 - left + 1
    height = y2 - top + 1

    hwindc = win32gui.GetWindowDC(hwin)
    srcdc = win32ui.CreateDCFromHandle(hwindc)
    memdc = srcdc.CreateCompatibleDC()
    bmp = win32ui.CreateBitmap()
    bmp.CreateCompatibleBitmap(srcdc, width, height)
    memdc.SelectObject(bmp)
    memdc.BitBlt((0, 0), (width, height), srcdc, (left, top), win32con.SRCCOPY)

    signedIntsArray = bmp.GetBitmapBits(True)
    img = np.fromstring(signedIntsArray, dtype='uint8')
    img.shape = (height, width, 4)

    srcdc.DeleteDC()
    memdc.DeleteDC()
    win32gui.ReleaseDC(hwin, hwindc)
    win32gui.DeleteObject(bmp.GetHandle())

    return cv2.cvtColor(img, cv2.COLOR_BGRA2BGR)
通過img0 = grab_screen_win32(region=(0, 0, 1920, 1080))來作為im的參數傳入,即可讓屏幕截圖作為推理圖片
用OpenCV繪製視窗並顯示
if len(boxs):
    for i, det in enumerate(boxs):
        _, x_center, y_center, width, height = det
        x_center, width = re_x * float(x_center), re_x * float(width)
        y_center, height = re_y * float(y_center), re_y * float(height)
        top_left = (int(x_center - width / 2.), int(y_center - height / 2.))
        bottom_right = (int(x_center + width / 2.), int(y_center + height / 2.))
        color = (0, 0, 255)  # RGB
        cv2.rectangle(img0, top_left, bottom_right, color, thickness=thickness)

和

cv2.namedWindow('windows', cv2.WINDOW_NORMAL)
cv2.resizeWindow('windows', re_x // 2, re_y // 2)
cv2.imshow('windows', img0)
HWND = win32gui.FindWindow(None, "windows")
win32gui.SetWindowPos(HWND, win32con.HWND_TOPMOST, 0, 0, 0, 0, win32con.SWP_NOMOVE | win32con.SWP_NOSIZE)
結合在一起
最終代碼
import torch, pynput
import numpy as np
import win32gui, win32con, cv2
from grabscreen import grab_screen_win32 # 本地文件
from utils.augmentations import letterbox
from models.common import DetectMultiBackend
from utils.torch_utils import select_device
from utils.general import non_max_suppression, scale_boxes, xyxy2xywh


# 可調參數
conf_thres = 0.25
iou_thres = 0.05
thickness = 2
x, y = (1920, 1080)
re_x, re_y = (1920, 1080)


def LoadModule():
    device = select_device('')
    weights = 'yolov5s.pt'
    model = DetectMultiBackend(weights, device=device, dnn=False, fp16=False)
    return model


model = LoadModule()
while True:
    names = model.names
    img0 = grab_screen_win32(region=(0, 0, 1920, 1080))

    im = letterbox(img0, 640, stride=32, auto=True)[0]  # padded resize
    im = im.transpose((2, 0, 1))[::-1]  # HWC to CHW, BGR to RGB
    im = np.ascontiguousarray(im)  # contiguous
    im = torch.from_numpy(im).to(model.device)
    im = im.half() if model.fp16 else im.float()  # uint8 to fp16/32
    im /= 255  # 0 - 255 to 0.0 - 1.0
    if len(im.shape) == 3:
        im = im[None]  # expand for batch dim
    pred = model(im, augment=False, visualize=False)
    pred = non_max_suppression(pred, conf_thres=conf_thres, iou_thres=iou_thres, classes=None, agnostic=False,
                               max_det=1000)
    boxs=[]
    for i, det in enumerate(pred):  # per image
        im0 = img0.copy()
        s = ' '
        s += '%gx%g ' % im.shape[2:]  # print string
        gn = torch.tensor(img0.shape)[[1, 0, 1, 0]]  # normalization gain whwh
        imc = img0  # for save_crop

        if len(det):
            # Rescale boxes from img_size to im0 size
            det[:, :4] = scale_boxes(im.shape[2:], det[:, :4], im0.shape).round()
            # Print results
            for c in det[:, 5].unique():
                n = (det[:, 5] == c).sum()  # detections per class
                s += f"{n} {names[int(c)]}{'s' * (n > 1)}, "  # add to string

        # Write results
        for *xyxy, conf, cls in reversed(det):
            xywh = (xyxy2xywh(torch.tensor(xyxy).view(1, 4)) / gn).view(-1).tolist()  # normalized xywh
            line = (cls, *xywh)  # label format
            box = ('%g ' * len(line)).rstrip() % line
            box = box.split(' ')
            boxs.append(box)
        if len(boxs):
            for i, det in enumerate(boxs):
                _, x_center, y_center, width, height = det
                x_center, width = re_x * float(x_center), re_x * float(width)
                y_center, height = re_y * float(y_center), re_y * float(height)
                top_left = (int(x_center - width / 2.), int(y_center - height / 2.))
                bottom_right = (int(x_center + width / 2.), int(y_center + height / 2.))
                color = (0, 0, 255)  # RGB
                cv2.rectangle(img0, top_left, bottom_right, color, thickness=thickness)
    if cv2.waitKey(1) & 0xFF == ord('q'):
        cv2.destroyWindow()
        break
    cv2.namedWindow('windows', cv2.WINDOW_NORMAL)
    cv2.resizeWindow('windows', re_x // 2, re_y // 2)
    cv2.imshow('windows', img0)
    HWND = win32gui.FindWindow(None, "windows")
    win32gui.SetWindowPos(HWND, win32con.HWND_TOPMOST, 0, 0, 0, 0, win32con.SWP_NOMOVE | win32con.SWP_NOSIZE)
End.


