
使用實例詳細闡述 日曆簽到功能 的實現方案,及 項目文件結構的設置方法
概述
在 App 中,日曆通常與簽到功能結合使用。是提高用戶活躍度的一種方式,同時,簽到數據中蘊含了豐富的極其有價值的信息。下麵我們就來看看如何在 App 中實現日曆簽到功能。
效果圖
。。。。。
思路分析
實現日曆簽到功能的思路有很多種,這裡我們就使用 UICollectionView 來實現具備簽到功能的日曆- 基礎知識
- 關於瀑布流(若你對 UICollectionView 及 UICollectionViewLayout 的知識不太瞭解,請參照以下文章)
- 關於佈局(使用 CocoaPods 集成第三方框架 Masonry 進行界面佈局,若你對 CocoaPods 的使用不太瞭解,請參照以下文章)
- 關於 pch 文件的配置方法,請參照以下文章
關於項目的文件結構
在應用開發過程中,我們通常會指定一定的文件結構,便於項目的開發和維護。該博客中的文件結構如圖: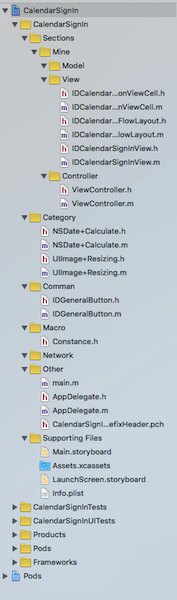
- 圖中一級文件結構的的劃分是按照應用的業務模塊劃分,如:
- Sections:應用的功能模塊
- Network:應用的網路請求模塊
- Common:應用中通用的文件,通常是自定義控制項
- Macro:應用中的巨集
- Category:應用中的分類
- Other:其他,如:Appdelegate,main,pch 等文件
- 圖中二級文件結構的的劃分是按照應用的功能模塊劃分,如:
- Mine:是一個項目中,通常具備的功能模塊
- 圖中三級級文件結構的的劃分是按照 MVC 架構模式劃分,如:
- Model
- View
- Controller
- 圖中一級文件結構的的劃分是按照應用的業務模塊劃分,如:
- 思路
- 顯示“日曆”所需要的數據(使用 NSDate 的分類提供)
- 當前月總共有多少天,即:“日曆” CollectionView 中 Item 的數量
- 當前月中共有多少周,即:“日曆” CollectionView 的行數
- 當前月中第一天在一周內的索引,即:實現“日曆”中的每一天與周幾信息對應
- 當天在當月中的索引(第幾天),即:點擊“簽到”按鈕時,通過索引找到“日曆” CollectionView 中的 Item 更新 “簽到”標簽的狀態
- “日曆”佈局(使用 IDCalendarCollectionViewFlowLayout 定義)
- 在這裡使用自定義流水佈局來設置 “日曆” CollectionView 的佈局(使用 frame 佈局 每一個 Item)
- “日曆” 控制項
- 整個日曆控制項(IDCalendarSignInView)中封裝了以下控制項
- calendarDateView:顯示日期,如:2016年03月
- calendarWeekdayView:顯示周幾信息,如:日 一 二 …… 六
- calendarCollectionView:顯示日曆
- seperatorView:分割線
- 子控制項的佈局
- 在這裡,統一在 layoutSubviews 方法中佈局子控制項(此時獲取到的 IDCalendarSignInView 控制項的 frame 才是最終確定的)。這一個規範,儘量遵守,可以避免很多難以調試的 bug
- 整個日曆控制項(IDCalendarSignInView)中封裝了以下控制項
- 顯示“日曆”所需要的數據(使用 NSDate 的分類提供)
具體實現
- 聲明
此部分主要闡述代碼實現,代碼中有詳細的註釋,若對以上思路不太理解,可以結合代碼整理自己的思路由於篇幅限制,在這裡,不再貼出應用實現的全部代碼。若有需要的朋友,請聯繫我,我將提供完整的工程文件。感謝您的理解和支持,您的支持是我堅持下去最大的動力,真心的謝謝你們。以下是我的 Blog 地址:
- 提供顯示“日曆”所需要的數據( NSDate+Calculate 文件 )
獲取當前月總共有多少天
+ (NSInteger)numberOfDaysInCurrentMonth {
    // 初始化日曆
    NSCalendar *calendar = [[NSCalendar alloc] initWithCalendarIdentifier:NSCalendarIdentifierGregorian];
    // 獲取系統當前日期
    NSDate *currentDate = [NSDate date];
    // 獲取當前日期中當前月中天的範圍
    NSRange range = [calendar rangeOfUnit:NSCalendarUnitDay inUnit:NSCalendarUnitMonth forDate:currentDate];
    // 得到當前月中總共有多少天(即範圍的長度)
    NSInteger numberOfDaysInCurrentMonth = range.length;
    return numberOfDaysInCurrentMonth;
}
獲取當前月中共有多少周
+ (NSInteger)numberOfWeeksInCurrentMonth {
    // 初始化日曆
    NSCalendar *calendar = [[NSCalendar alloc] initWithCalendarIdentifier:NSCalendarIdentifierGregorian];
    // 獲取系統當前日期
    NSDate *currentDate = [NSDate date];
    // 獲取當前日期中當前月中周的範圍
    NSRange range = [calendar rangeOfUnit:NSCalendarUnitWeekOfMonth inUnit:NSCalendarUnitMonth forDate:currentDate];
    // 得到當前月中總共有多少周(即範圍的長度)
    NSInteger numberOfWeeksInCurrentMonth = range.length;
    return numberOfWeeksInCurrentMonth;
}
- 自定義流水佈局( IDCalendarCollectionViewFlowLayout 文件 )
設置每一個 Item 的佈局
/** 設置 indexPath 位置的 Item 的佈局屬性 */
- (UICollectionViewLayoutAttributes *)layoutAttributesForItemAtIndexPath:(NSIndexPath *)indexPath {
    // 獲取 indexPath 位置的佈局屬性
    UICollectionViewLayoutAttributes *layoutAttributes = [UICollectionViewLayoutAttributes layoutAttributesForCellWithIndexPath:indexPath];
    // 計算每一個 Item 的 frame
    CGFloat collectionViewLeftPadding = self.collectionView.contentInset.left;
    CGFloat collectionViewRightPadding = self.collectionView.contentInset.right;
    // size
    CGFloat itemWidth = (self.collectionView.bounds.size.width - collectionViewLeftPadding - collectionViewRightPadding - 5*IDCalendarCollectionViewCellHerizontalMargin) / 7.0;
    CGFloat itemHeigh = self.collectionView.bounds.size.height / [NSDate numberOfWeeksInCurrentMonth];
    // origin
    CGFloat itemX = ((self.indexOfWeekForFirstDayInCurrentMonth + indexPath.item) % 7) * (itemWidth + IDCalendarCollectionViewCellHerizontalMargin);
    CGFloat itemY = ((self.indexOfWeekForFirstDayInCurrentMonth + indexPath.item) / 7) * itemHeigh;
    layoutAttributes.frame = CGRectMake(itemX, itemY, itemWidth, itemHeigh);
    // 返回 indexPath 位置的 Item 的佈局屬性
    return layoutAttributes;
}
- 自定義“日曆” CollectionView 的 Cell( IDCalendarCollectionViewCell 文件 )
提供介面,用於控制簽到標簽的狀態
/** 是否已經簽到 */
@property (nonatomic, assign) BOOL haveSignedIn;
/** 重寫 set 方法,用於更新 “簽到” 標簽的狀態 */
- (void)setHaveSignedIn:(BOOL)haveSignedIn {
    _haveSignedIn = haveSignedIn;
    if (_haveSignedIn) {
        self.signInLabel.hidden = NO;
    } else {
        self.signInLabel.hidden = YES;
    }
}
添加子控制項
- (instancetype)initWithFrame:(CGRect)frame {
    if (self = [super initWithFrame:frame]) {
        // 初始化 “日期數字” label,並添加到 cell 中
        self.dateLabel = [[UILabel alloc] init];
        self.dateLabel.textColor = [UIColor colorWithRed:122/255.0 green:122/255.0 blue:122/255.0 alpha:1.0];
        [self.contentView addSubview:self.dateLabel];
        // 初始化 “簽到” label,並添加到 cell 中
        self.signInLabel = [[UILabel alloc] init];
        self.signInLabel.hidden = YES; // 預設隱藏“簽到”標簽
        self.signInLabel.textColor = [UIColor colorWithRed:228/255.0 green:49/255.0 blue:42/255.0 alpha:1.0];
        self.signInLabel.font = [UIFont systemFontOfSize:10];
        self.signInLabel.text = @"簽到";
        [self.contentView addSubview:self.signInLabel];
    }
    return self;
}
- 自定義“日曆簽到”控制項( IDCalendarSignInView 文件)
添加子控制項
/** 設置 “日期” 部分 */
- (void)setupCalendarDateView {
    // 初始化 “日期” View,並添加到 IDCalendarSignInView
    self.calendarDateView = [[UIView alloc] init];
    [self addSubview:self.calendarDateView];
    // 初始化分割線 並添加到 “日期” View
    self.dateSeperatorView = [[UIView alloc] init];
    self.dateSeperatorView.backgroundColor = [UIColor colorWithRed:226/255.0 green:226/255.0 blue:226/255.0 alpha:1.0];
    [self.calendarDateView addSubview:self.dateSeperatorView];
    // 初始化日期 label 並添加到 “日期” View
    self.calendarDateLabel = [[UILabel alloc] init];
    self.calendarDateLabel.font = [UIFont systemFontOfSize:15];
    NSDate *currentDate = [NSDate date];
    NSDateFormatter *dateFormatter = [[NSDateFormatter alloc] init];
    dateFormatter.dateFormat = @"yyyy年MM月";
    NSString *dateString = [dateFormatter stringFromDate:currentDate];
    self.calendarDateLabel.text = dateString;
    [self.calendarDateView addSubview:self.calendarDateLabel];
}
/** 設置 “周幾” 部分 */
- (void)setupCalendarWeekdayView {
    // 初始化 “日期” View,並添加到 IDCalendarSignInView
    self.calendarWeekdayView = [[UIView alloc] init];
    [self addSubview:self.calendarWeekdayView];
    // 初始化分割線 並添加到 “周幾” View
    self.weekdaySeperatorView = [[UIView alloc] init];
    self.weekdaySeperatorView.backgroundColor = [UIColor colorWithRed:226/255.0 green:226/255.0 blue:226/255.0 alpha:1.0];
    [self.calendarWeekdayView addSubview:self.weekdaySeperatorView];
    // 初始化 “周幾” label 並添加到 “周幾” View
    NSArray *weekday = @[@"日", @"一", @"二", @"三", @"四", @"五", @"六"];
    for (NSInteger i = 0; i < 7; i++) {
        UILabel *weekDayLabel = [[UILabel alloc] initWithFrame:CGRectZero];
        weekDayLabel.textAlignment = NSTextAlignmentCenter;
        weekDayLabel.font = [UIFont systemFontOfSize:13];
        weekDayLabel.textColor = [UIColor colorWithRed:97/255.0 green:97/255.0 blue:97/255.0 alpha:1.0];
        weekDayLabel.text = weekday[i];
        // 將 “周幾” 信息保存在成員變數中
        [self.weekdayLabelArray addObject:weekDayLabel];
        [self.calendarWeekdayView addSubview:weekDayLabel];
    }
}
/** 設置 “日曆” 部分 */
- (void)setupCalendarCollectionView {
    // 設置 "日曆" 的佈局
    IDCalendarCollectionViewFlowLayout *flowLayout = [[IDCalendarCollectionViewFlowLayout alloc] init];
    flowLayout.headerReferenceSize = CGSizeMake(self.bounds.size.width, 20);
    // 初始化 “日曆” CollectionView,設置相關屬性,並添加到 IDCalendarSignInView
    self.calendarCollectionView = [[UICollectionView alloc] initWithFrame:CGRectZero collectionViewLayout:flowLayout];
    self.calendarCollectionView.backgroundColor = [UIColor whiteColor];
    self.calendarCollectionView.scrollEnabled = NO;
    self.calendarCollectionView.dataSource = self;
    self.calendarCollectionView.delegate = self;
    [self.calendarCollectionView registerClass:[IDCalendarCollectionViewCell class] forCellWithReuseIdentifier:IDCalendarCollectionViewCellIdentifier];
    [self addSubview:self.calendarCollectionView];
    // 初始化分割線 並添加到 “日曆” View
    self.collectionViewSeperatorArray = [NSMutableArray array];
    for (NSInteger i = 0; i < [NSDate numberOfWeeksInCurrentMonth]; i++) {
        UIView *collectionViewSeperator = [[UIView alloc] initWithFrame:CGRectZero];
        collectionViewSeperator.backgroundColor = [UIColor colorWithRed:226/255.0 green:226/255.0 blue:226/255.0 alpha:1.0];
        [self.collectionViewSeperatorArray addObject:collectionViewSeperator];
        [self.calendarCollectionView addSubview:collectionViewSeperator];
    }
    // 設置“日曆” View 的內邊距
    self.calendarCollectionView.contentInset = UIEdgeInsetsMake(0, 15, 0, 15);
}
佈局子控制項
- (void)layoutSubviews {
    [super layoutSubviews];
    // “日期”
    [self.calendarDateView mas_makeConstraints:^(MASConstraintMaker *make) {
        make.leading.trailing.equalTo(self);
        make.top.equalTo(self.mas_top);
        make.height.offset(35);
    }];
    // “周幾”
    [self.calendarWeekdayView mas_makeConstraints:^(MASConstraintMaker *make) {
        make.leading.trailing.equalTo(self);
        make.top.equalTo(self.calendarDateView.mas_bottom);
        make.height.offset(38);
    }];
    // “日曆”
    [self.calendarCollectionView mas_makeConstraints:^(MASConstraintMaker *make) {
        make.top.equalTo(self.calendarWeekdayView.mas_bottom);
        make.leading.trailing.bottom.equalTo(self);
    }];
    // “日期” 部分的分割線
    [self.dateSeperatorView mas_makeConstraints:^(MASConstraintMaker *make) {
        make.leading.trailing.top.equalTo(self.calendarDateView);
        make.height.offset(1);
    }];
    // 周幾信息
    for (NSInteger i = 0; i < 7; i++) {
        self.weekdayLabelArray[i].frame = CGRectMake(i * (self.calendarCollectionViewItemSize.width + 10) + 15, 0, self.calendarCollectionViewItemSize.width, 35);
    }
    // “周幾” 部分的分割線
    [self.weekdaySeperatorView mas_makeConstraints:^(MASConstraintMaker *make) {
        make.leading.top.trailing.equalTo(self.calendarWeekdayView);
        make.height.offset(1);
    }];
    // “日曆” 顯示日期的 label
    [self.calendarDateLabel mas_makeConstraints:^(MASConstraintMaker *make) {
        make.centerX.centerY.equalTo(self.calendarDateView);
    }];
    // “日曆” 部分的分割線
    for (NSInteger i = 0; i < [NSDate numberOfWeeksInCurrentMonth]; i++) {
        self.collectionViewSeperatorArray[i].frame = CGRectMake(0, i * self.calendarCollectionViewItemSize.height, [UIScreen mainScreen].bounds.size.width - 30, 1);
    }
}
提供“日曆” CollectionView 的數據源
- (NSInteger)collectionView:(UICollectionView *)collectionView numberOfItemsInSection:(NSInteger)section {
    return [NSDate numberOfDaysInCurrentMonth];
}
- (UICollectionViewCell *)collectionView:(UICollectionView *)collectionView cellForItemAtIndexPath:(NSIndexPath *)indexPath {
    IDCalendarCollectionViewCell *cell = [collectionView dequeueReusableCellWithReuseIdentifier:IDCalendarCollectionViewCellIdentifier forIndexPath:indexPath];
    cell.numberTextInDateLabel = indexPath.item + 1;
    return cell;
}
- “簽到”按鈕( IDConfirmButton 文件)
- 類似於“簽到”按鈕這樣外觀的按鈕,是應用中比較常見的按鈕,如:“確定”、“取消”按鈕通常也是這種外觀,通常我們將這樣的按鈕寫成一個通用的空間,放到 Common 文件中
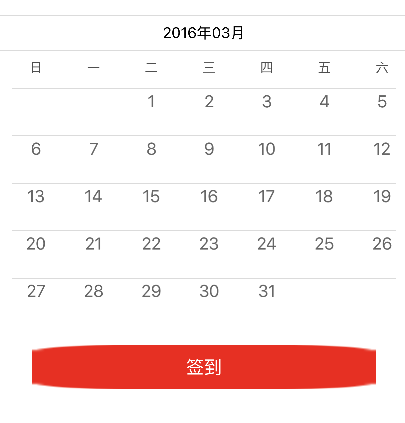
未指定拉伸區域時的效果
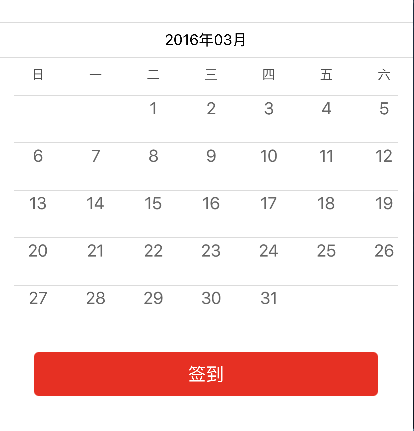
指定拉伸區域後的效果
自定義 IDConfirmButton
- (instancetype)initWithFrame:(CGRect)frame {
    if (self = [super initWithFrame:frame]) {
        [self setTitleColor:[UIColor whiteColor] forState:UIControlStateNormal];
        [self setBackgroundImage:[UIImage resizedImageWithName:@"btn_normal"] forState:UIControlStateNormal];
        [self setBackgroundImage:[UIImage resizedImageWithName:@"btn_highlight"] forState:UIControlStateHighlighted];
        [self setBackgroundImage:[UIImage resizedImageWithName:@"btn_disable"] forState:UIControlStateDisabled];
        self.layer.cornerRadius = 5.0;
        self.layer.masksToBounds = YES;
    }
    return self;
}
IDConfirmButton 的圖片,若提供的圖片的尺寸,不等於按鈕的尺寸,圖片就會被拉伸。當圖片具有圓角是,拉伸後的圖片通常不複合需求,所以我們需要指定圖片的拉伸區域(UIImage+Resizing)
/** 返回一張圖片,按指定方式拉伸的圖片:width * 0.5 : height * 0.5 */
+ (UIImage *)resizedImageWithName:(NSString *)name {
    UIImage *image = [UIImage imageNamed:name];
    return [image stretchableImageWithLeftCapWidth:image.size.width * 0.5 topCapHeight:image.size.height * 0.5];
}
添加“日曆簽到”控制項
將“日曆簽到”控制項添加到控制器的 view 上
- (void)viewDidLoad {
    [super viewDidLoad];
    // 添加“日曆簽到”視圖
    self.calendarSignInView = [[IDCalendarSignInView alloc] init];
    [self.view addSubview:self.calendarSignInView];
    // 添加“簽到”按鈕
    self.signInButton = [[IDConfirmButton alloc] init];
    [self.signInButton setTitle:@"簽到" forState:UIControlStateNormal];
    [self.signInButton addTarget:self action:@selector(signInButtonClick:) forControlEvents:UIControlEventTouchUpInside];
    [self.view addSubview:self.signInButton];
}
點擊“簽到”按鈕,更新簽到標簽的狀態
- (void)signInButtonClick:(UIButton *)button {
    self.calendarSignInView.isSignInForToday = YES;
}


